Warehouse Receipt
In SIEVERS WMS, a distinction is made between several types of warehouse receipt:
Possible are
- document-oriented warehouse receipts and
- physical warehouse receipts (MDE).
These are further divided into
- One-step warehouse receipts and
- Two-step warehouse receipts.
Perform a one-step document-oriented warehouse receipt
As soon as an inbound delivery has been notified, you can start creating a warehouse receipt in SIEVERS WMS. This section describes how to perform a one-step Warehouse Receipt Process.
Hinweis
In order to be able to carry out a warehouse receipt, an source document must exist, such as a purchase order or sales return orders.
First create a new Warehouse Receipt Process on the Warehouse Receipt page. Alternatively, you can also create a warehouse receipt directly from a purchase order and skip steps 2-4. To do this, select Create warehouse receipt in the start menu.
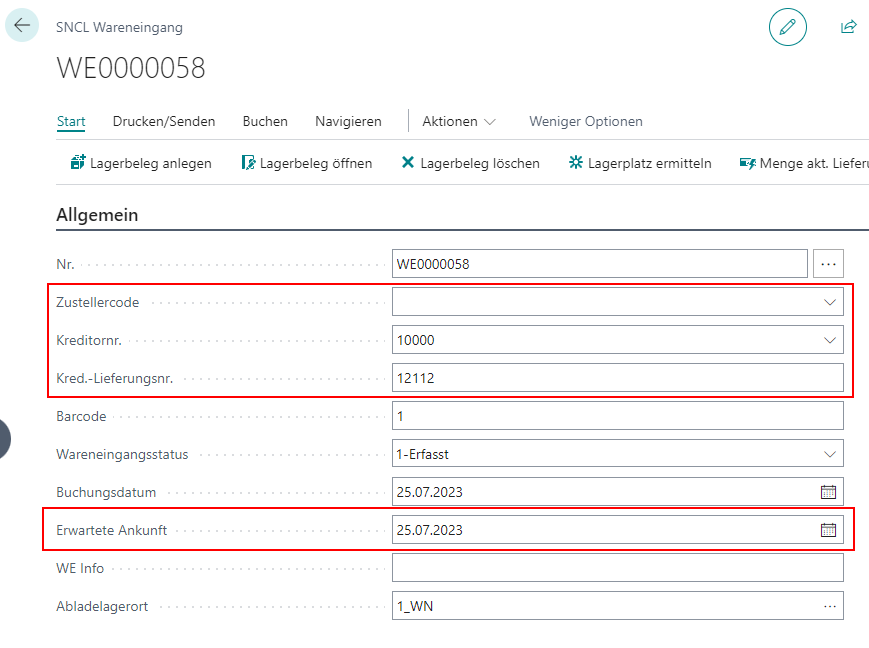
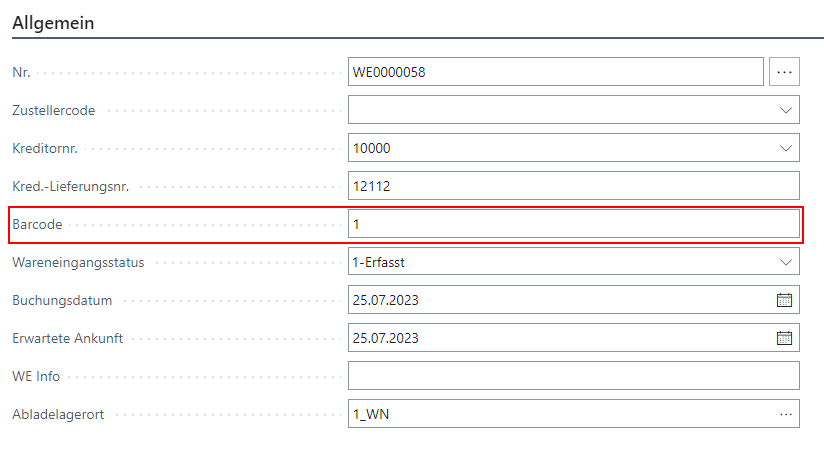
The following fields must then be filled in the warehouse receipt:
- Shipping Agent Code or Vendor No.
- Vendor Shipment No. with the delivery note no.
- Expected arrival
- You can now assign a purchase order to this warehouse receipt via Start -> Get source documents. Alternatively, you can also manually enter several shipment notes in the [document lines](#receipt entry) of the warehouse receipt. In this case, the document numbers of the shipment notes are entered first.


If it is a notified warehouse receipt, you can now set the warehouse receipt status to 0-Notified.
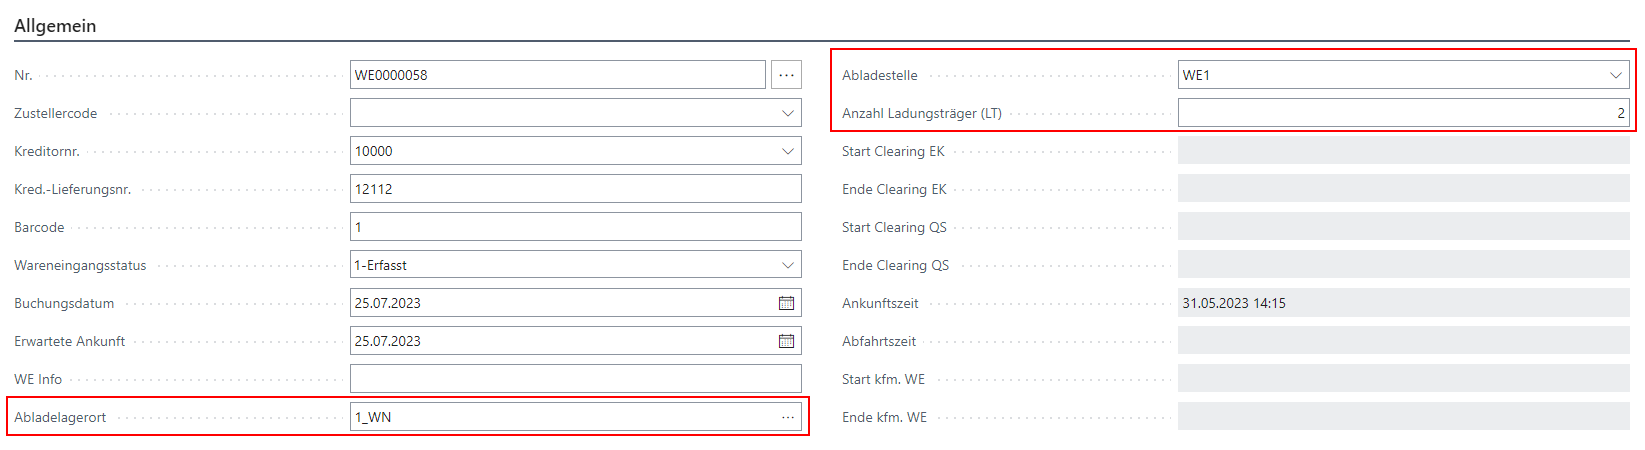
At the latest when the shipment has arrived, the Number of load carriers field in the Warehouse Receipt Header must be filled.
Items can also be marked separately with item labels at this point if required. To do this, select Print item label via the "Line" menu of the document lines after selecting the item.

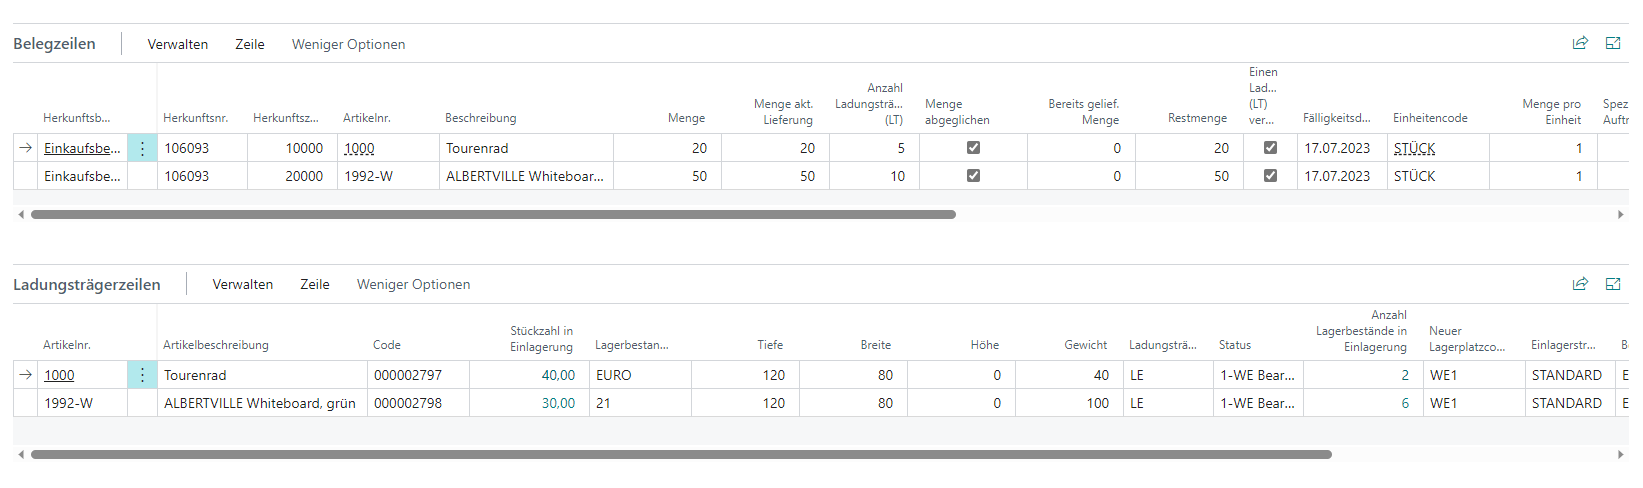
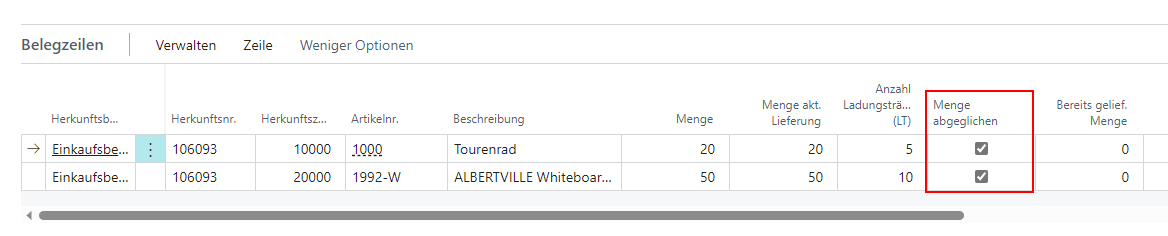
- The document lines in the Qty. to Receive field are now filled with the quantity actually received. With this input, the fields Quantity load carrier and No. of Inventories per Load Carrier in the receipt line are automatically calculated based on the item's packaging hierarchy. Both fields are editable and can be adjusted manually if needed. If no packaging hierarchy exists, Quantity load carrier is set to 0 and must be entered manually before Quantity checked can be set. By clicking Quantity checked, the load carrier lines are created based on the entered values. In addition, the inventory measure is automatically set to the Inventory measure code picking configured in the SIEVERS WMS setup. The new storage place code in the load carrier lines is generated using the Inbound Stock Post strategy. You can adjust this if necessary.
Hinweis
Please make sure that no Warehouse Receipt Strategy is stored in the SIEVERS WMS setup or that the Warehouse Receipt Strategy is configured so that it does not lead to an unloading place. Otherwise, the unloading place at the Warehouse Receipt Header is automatically filled and the warehouse receipt becomes a two-stage warehouse receipt.
- for a better overview, a supplier package reference can be entered in the Label comment text field. This comment text is printed on the package and enables the warehouse receipt employee to identify the individual package more quickly.

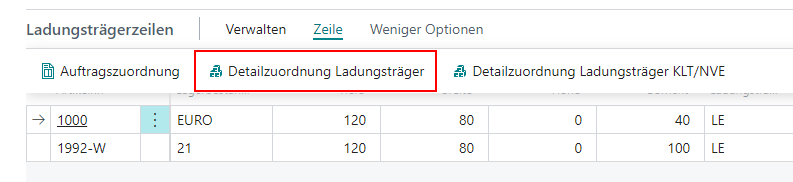
- if necessary, you can edit the assigned load carriers in detail in the [Load carrier lines](#container lines) area. The Detailed assignment of load carriers can also help here. You can use this to post different items to a load carrier, change the quantity assignment and create a print lead for the labels of all load carriers and items.
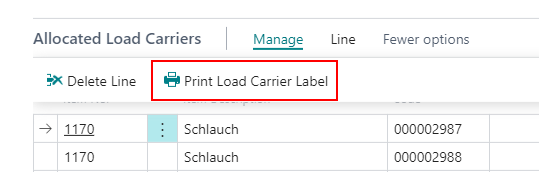
- now print the load carrier labels and attach them to the pallets. This will ensure that the pallets can be clearly identified in subsequent processes.
- The shipment can then be accepted with a forklift, for example. Here, the shipment note is marked by an employee in warehouse receipt with a copy of a blanco barcode. The original barcode can be given to the forklift driver, who marks the corresponding shipment or pallet. The barcode is then entered in the corresponding field of the warehouse receipt.
- you can now post the warehouse receipt. The prerequisite for this is that the setting Completion of warehouse receipt is set to After commercial check.
Perform a 2-step document-oriented warehouse receipt
As soon as an inbound delivery has been notified, you can start creating a warehouse receipt in SIEVERS WMS. This section describes how to carry out the Warehouse Receipt Process.
Hinweis
In order to be able to carry out a warehouse receipt, a source document must exist, such as a purchase order or sales return orders. In addition, a Warehouse Receipt Strategy must exist that routes warehouse receipts to the unloading places.
first create a new Warehouse Receipt Process on the Warehouse Receipt page. Alternatively, you can also create a warehouse receipt directly from a purchase order and skip steps 2-4. To do this, select Create warehouse receipt in the start menu.
the following fields must then be filled in the warehouse receipt:
- Shipping Agent Code or Vendor No.
- Vendor Shipment No. with the delivery note no.
- Expected arrival
- you can now assign a purchase order to this warehouse receipt via Home -> Get source documents. Alternatively, you can also manually enter several shipment notes in the [Voucher lines](#voucher entry) of the warehouse receipt. In this case, the document numbers of the shipment notes are entered first.
if it is a notified warehouse receipt, you can now set the warehouse receipt status to 0-Notified.
at the latest when the shipment has arrived, the fields
- Unloading location
- Unloading place
- Number of load carriers must be filled in.
The unloading place is filled automatically after filling or changing the unloading location. Alternatively, you can also fill it using Find storage place. This requires a Warehouse receipt strategy to be set up in the SIEVERS WMS setup.
- the shipment can then be accepted with a forklift truck, for example. Here, the shipment note is marked by an employee in warehouse receipt with a copy of a blank barcode. The original barcode can be given to the forklift driver, who marks the corresponding shipment or pallet. The barcode is then entered in the corresponding field of the warehouse receipt.
- at this point, items can also be marked separately with item labels if required. To do this, select Print item label via the "Line" menu of the document lines after selecting the item.
- the document lines in the Qty. to Receive field are now filled with the quantity actually received. With this input, the fields Quantity load carrier and No. of Inventories per Load Carrier in the receipt line are automatically calculated based on the item's packaging hierarchy. Both fields are editable and can be adjusted manually if needed. If no packaging hierarchy exists, Quantity load carrier is set to 0 and must be entered manually before Quantity checked can be set. By clicking Quantity checked, the load carrier lines are created based on the entered values. The new storage place code in the load carrier lines is generated using the Inbound Stock Post strategy. You can adjust this if necessary.
- for a better overview, a supplier package reference can be entered in the Comment text for label field. This comment text is printed on the package and enables the warehouse receipt employee to identify the individual package more quickly.
- then check whether the number of load carriers per document line still matches the quantities entered. If not, you can change the number. The Quantity checked field is deactivated again and must be set again.
- if necessary, you can edit the assigned load carriers in detail in the Allocated Load Carriers area. By changing the code, you can, for example, put items to other load carriers. The Detailed assignment of load carriers can also help here. You can use this to post different items to a load carrier, change the quantity assignment and create a print lead for the labels of all load carriers and items.
- now print the load carrier labels and attach them to the pallets. This will ensure that the pallets can be clearly identified in subsequent processes.
- You can now post the warehouse receipt. The prerequisite for this is that the setting Completion warehouse receipt is set to After commercial check.
- after the warehouse receipt has been posted, a move job list can be printed in the posted warehouse receipt. If no destination storage places can be found for an item, a place must be entered manually. The move order opens automatically.
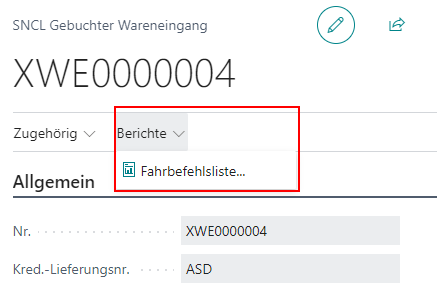
- to complete the warehouse receipt, search for the move job list by number on the move orders page and post it.
Perform a one-step physical warehouse receipt with MDE
Perform a two-step physical warehouse receipt with MDE
Warehouse receipt with GS1 barcode
The first use case where we have introduced GS1 identification is warehouse receipt. This section describes the changes in the process when you use GS1 identification.
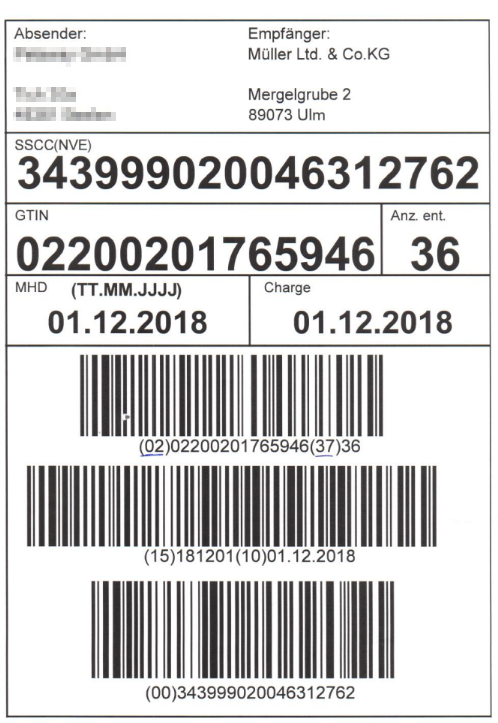
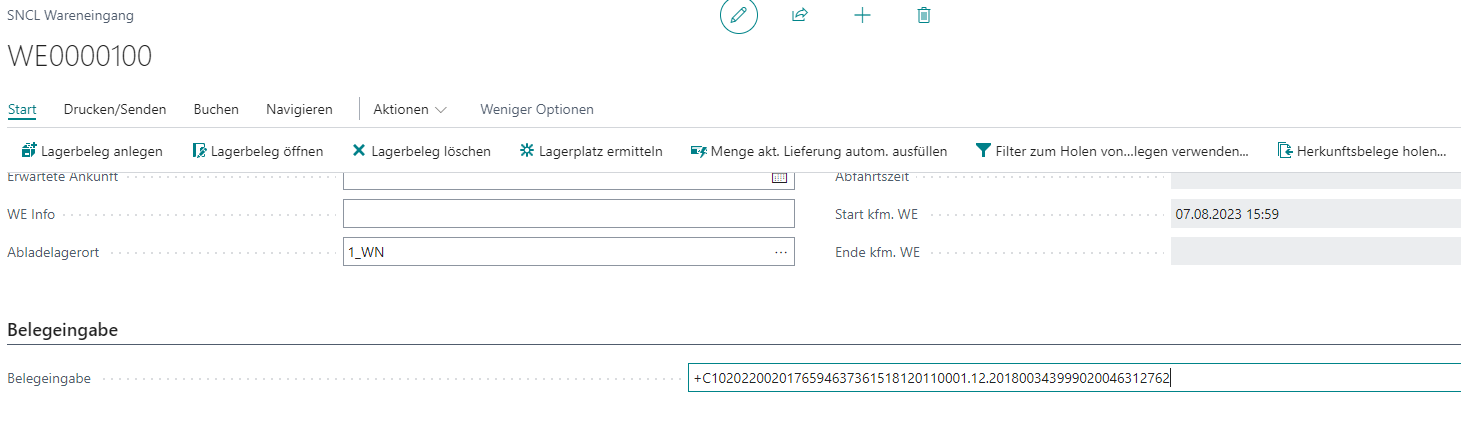
Instead of using Get source documents or Receipt entry normally in warehouse receipt, simply scan the barcode into the Receipt entry field. The system recognizes the specific GS1 barcode and changes its layout.
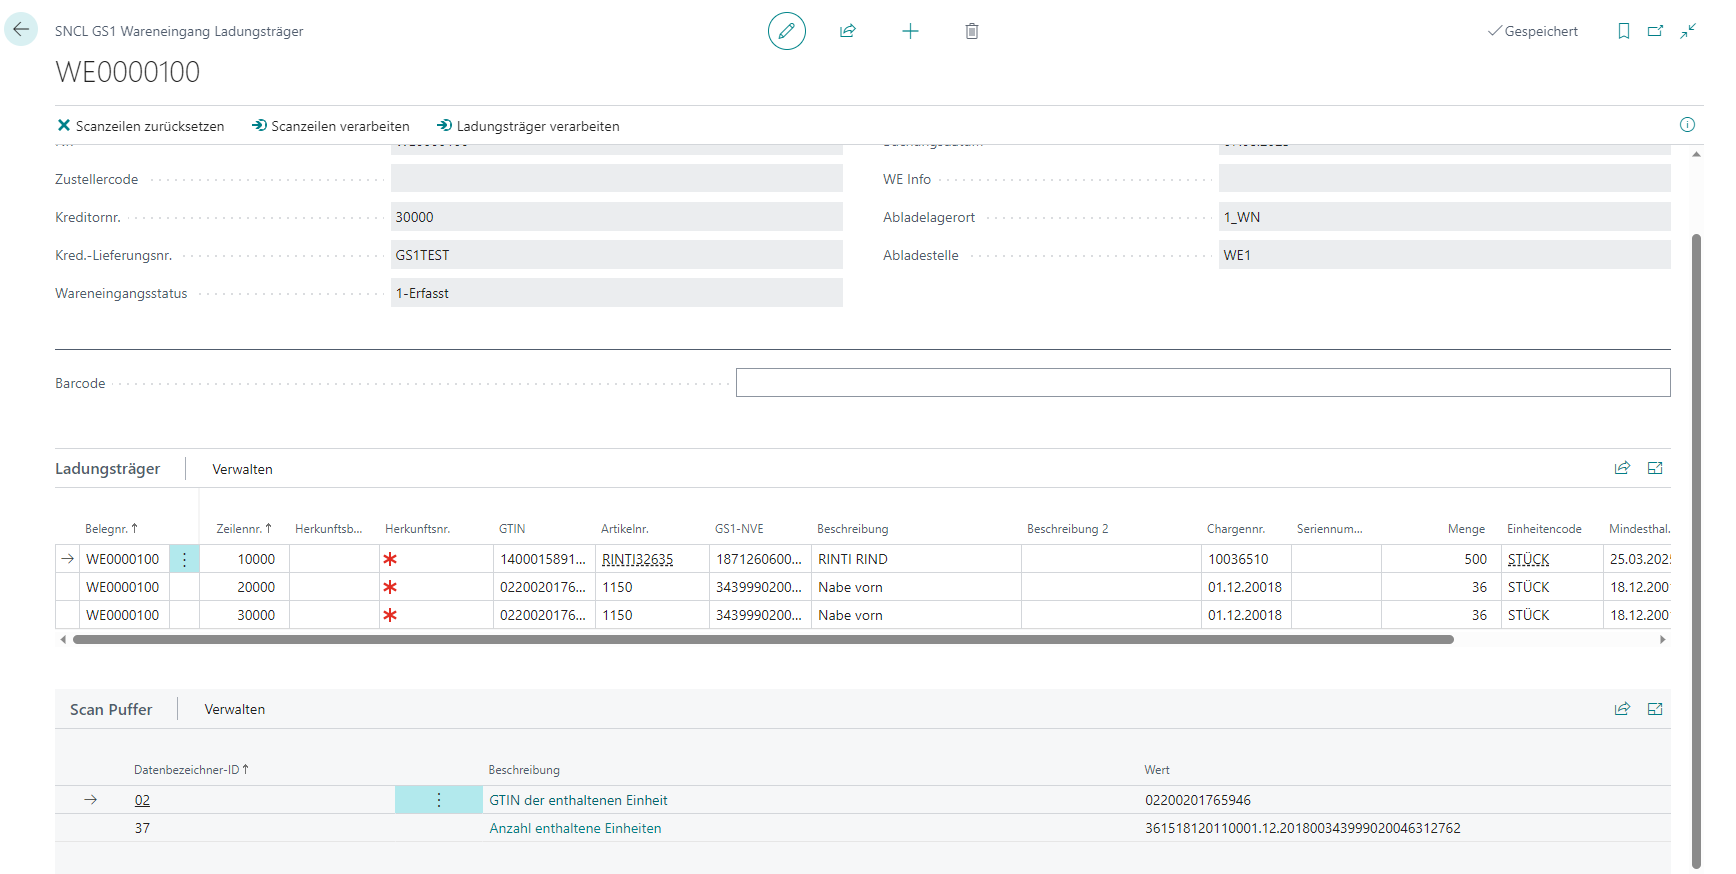
The screenshot shows that the system has already taken a lot of information from the barcode alone. In the Load carrier area, 3 load carriers with contents and lot no. have been entered.
Three descriptions can be seen in the Scan buffer area:
- 02 for the GTIN
- 37 for the number of units of measure received
This scan buffer shows all the descriptions that have been scanned in this process until all the mandatory identifiers for this warehouse receipt have been filled in. As soon as the last mandatory field has been filled in, the Process lines function is started. This means that the lines displayed on this page are transferred to the warehouse receipt.
These identifiers can be maintained in the GS1 SSCC identifier tables according to the vendor or customer. If no identifiers are entered there, the system assumes the GS1 standard and interprets the data during receipt entry based on the item master data entered.
Hinweis
If a Load Carrier has been recorded with a GS1 barcode, you can see this barcode via Related -> Show barcode references in the SNCL Load Carrier card. The barcode is always stored together with the check digit.
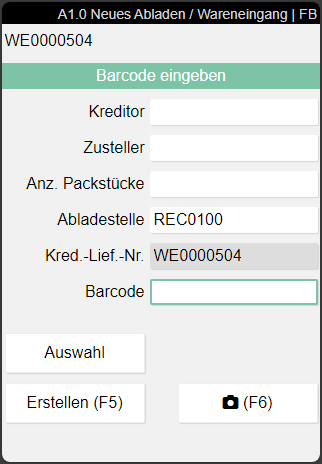
Warehouse receipt with GS1 barcode on the MDE device
This section describes how to enter a warehouse receipt from a GS1 vendor using the MDE device.
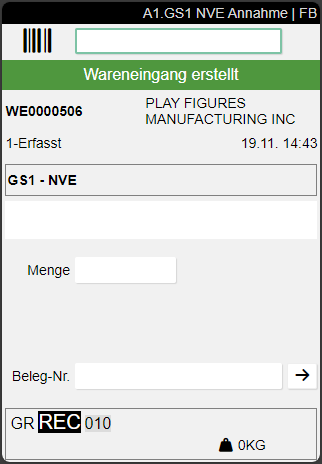
- A new warehouse receipt must be created at the beginning of the process.
 where you create a new warehouse receipt](../images/prozess_gs1_wareneingang_1.png) .
.
- Since the customer has assigned GS1 identifiers, A1.GS1 SSCC Receiving opens automatically.
- Now scan the barcode.
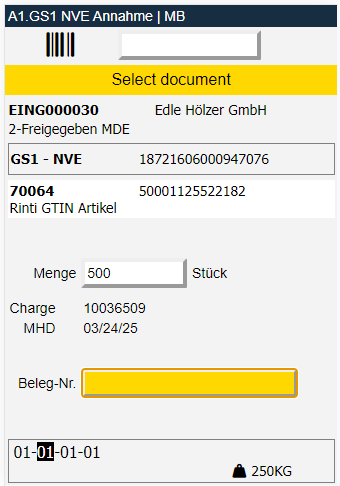
Hinweis
Alternatively, it is also possible to scan a Blanco Barcode in the GS1 Warehouse Receipt.
- Finally, the document number must be entered. Only then is the quantity completely processed and the corresponding load carriers generated. The stock document is also created. Processing is confirmed by the green coloring of the feedback.
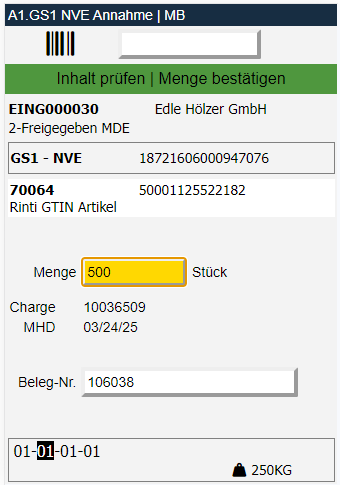
- The new load carrier is now shown in A1.2. You can now scan another GS1 barcode.
