Zebra Enterprise Browser Setup
The Zebra Enterprise Browser (ZEB) is the recommended browser for Zebra devices (e.g. TC73) when using SWMS Mobile. All required configurations can be applied to a device using StageNow barcodes or alternatively via Microsoft Intune with OEMConfig.
Configuration Methods Overview
| Method | Purpose | Suitable for | Know-how | Strengths | Limitations |
|---|---|---|---|---|---|
Manual (Config.xml directly) |
Direct editing of the Config.xml via a text editor or ADB. Full control over all ZEB settings. |
All ZEB-compatible devices | High (XML knowledge, ADB may be required) | Direct adjustment of all parameters possible | Error-prone, technically demanding, distributing to multiple devices is cumbersome |
| Zebra StageNow (Profile & Barcode) | PC tool for creating configuration profiles. Enables Wi-Fi setup, app installation, and file transfer. Profiles are exported as barcodes that the device scans. | All Zebra Android devices (Android 7+) | Medium (GUI tool, no programming required) | Simple & visual, browser + configuration deployable in one step, profiles reusable | Devices must be physically present for scanning; profiles must be recreated and redistributed after changes |
| MDM + OEMConfig (e.g. Intune) | Remote management via a Mobile Device Management solution. Using the Zebra app „OEMConfig powered by MX“, ZEB parameters can be set or the entire Config.xml distributed. |
Zebra Android devices with MX support (Android 8+, TC73/MC3400 with MX 11.9+); devices must be enrolled in MDM | Medium (MDM/Intune knowledge required) | Centralized control, changes pushed wirelessly to devices, efficient for large device fleets | MDM infrastructure required, higher initial setup effort |
Configuration Barcodes
Scan the following barcodes in the StageNow app on the device.
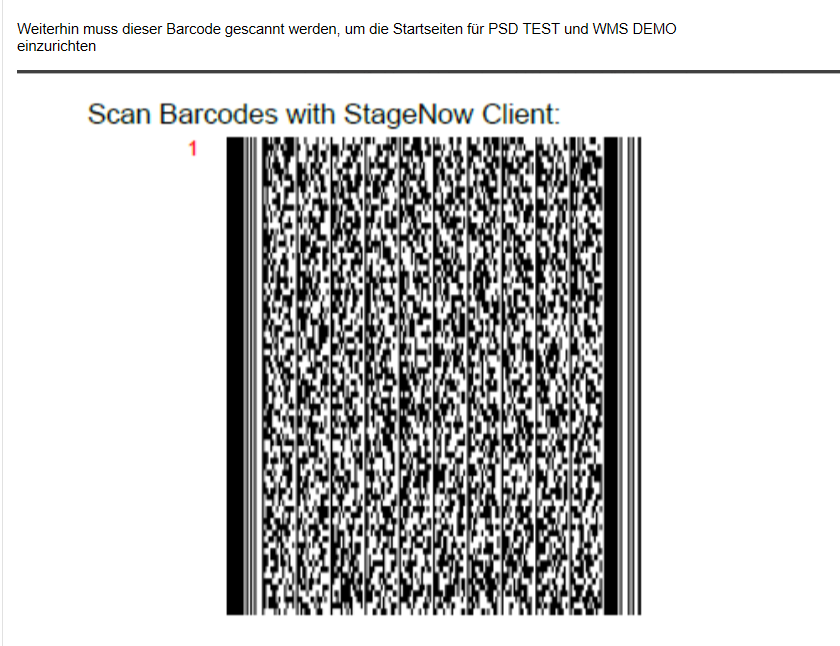
Start Page
Sets the Business Central start page in the Zebra Enterprise Browser. Without this barcode, SWMS Mobile is displayed at the wrong resolution and icons appear incorrectly.
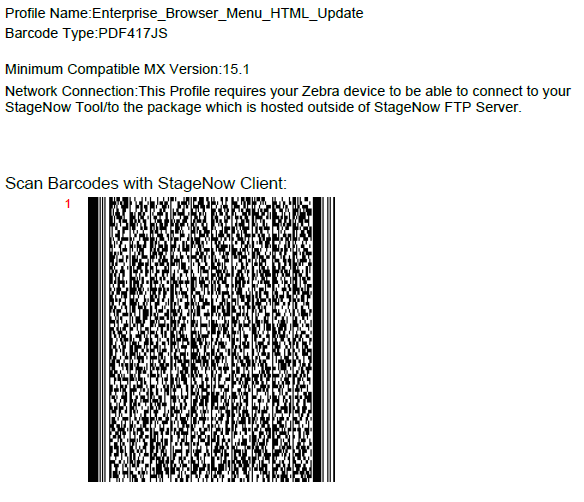
Menu
Adds the menu to the Zebra Enterprise Browser and enables the response to function keys (F1-F12).
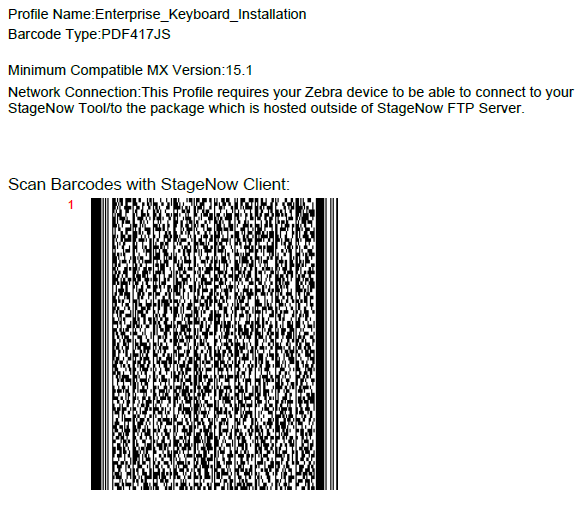
Enterprise Keyboard
Installs the Zebra Enterprise Keyboard on the device via StageNow.
Licensing
A separate license is required per device to use the Zebra Enterprise Browser. The license is activated using the Zebra License Manager app on the device with the Badge ID provided after purchasing licenses via the Zebra Software Licensing Portal. For detailed activation instructions, refer to the Zebra License Manager support page.
Hinweis
When setting up devices via Intune, license activation is handled as part of the OEMConfig configuration. See the Setup via Intune & OEMConfig section for details.
Setup via Intune & OEMConfig
As an alternative to StageNow barcodes, the Zebra Enterprise Browser can be configured and distributed using Microsoft Intune with OEMConfig. This enables centralized, scalable configuration deployment without physical access to devices.
Create Device Enrollment Token:
Before approaching the device, a token QR code must be created in the Intune Admin Center on a desktop.
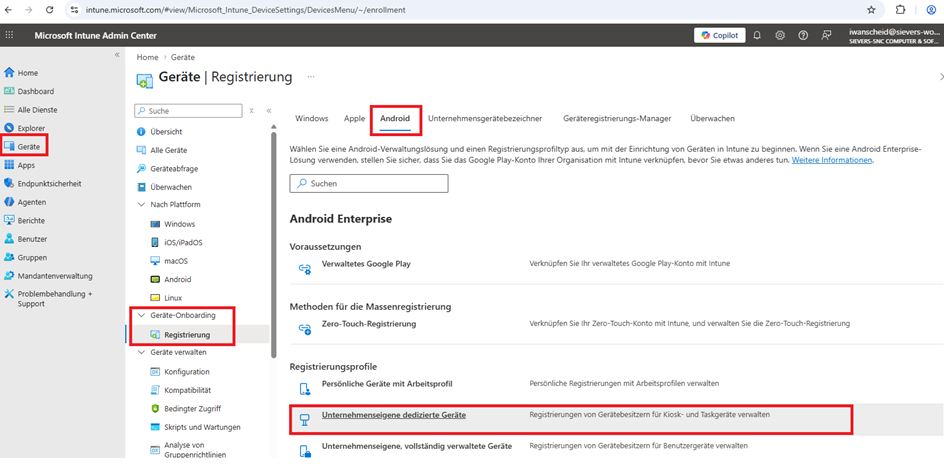
- Navigate to Devices -> Device onboarding and open Enrollment. Open the Android tab. Under Enrollment profiles, open Corporate-owned dedicated devices.
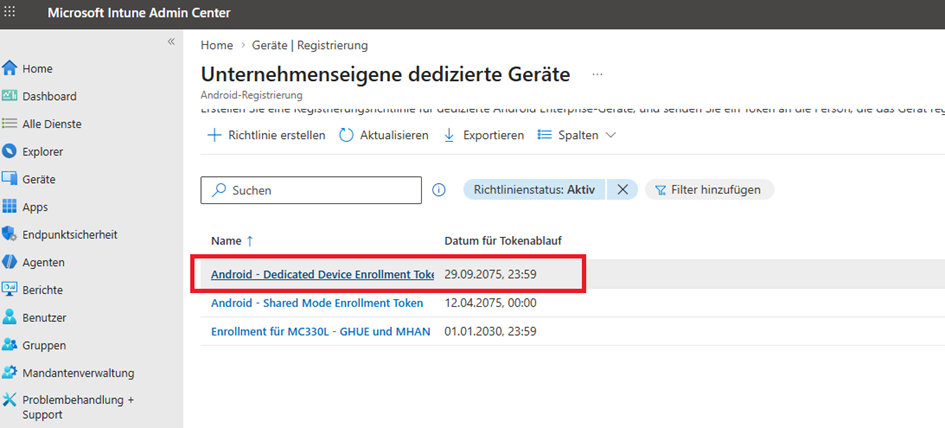
- Select Android - Dedicated Device Enrollment Token.
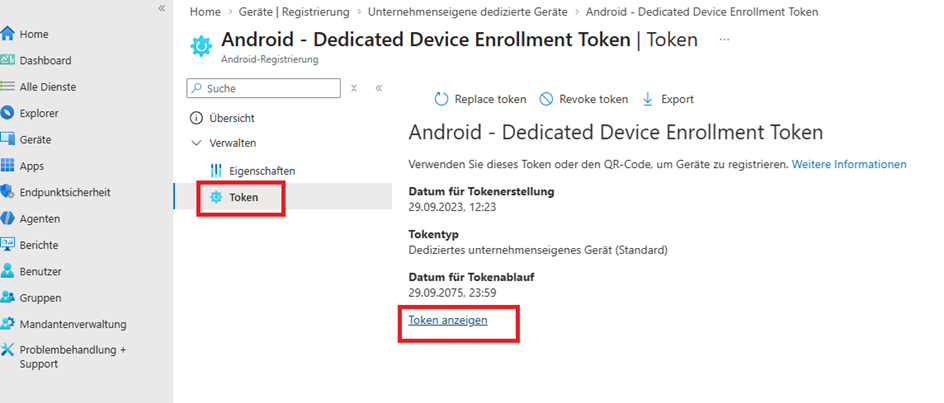
- Under Manage, click Token, then Show token. Now start the scanner.
Prepare the device:
Tap 6 times on the welcome screen of the new device – a QR scanner opens. Scan the Intune enrollment barcode and set up Wi-Fi.
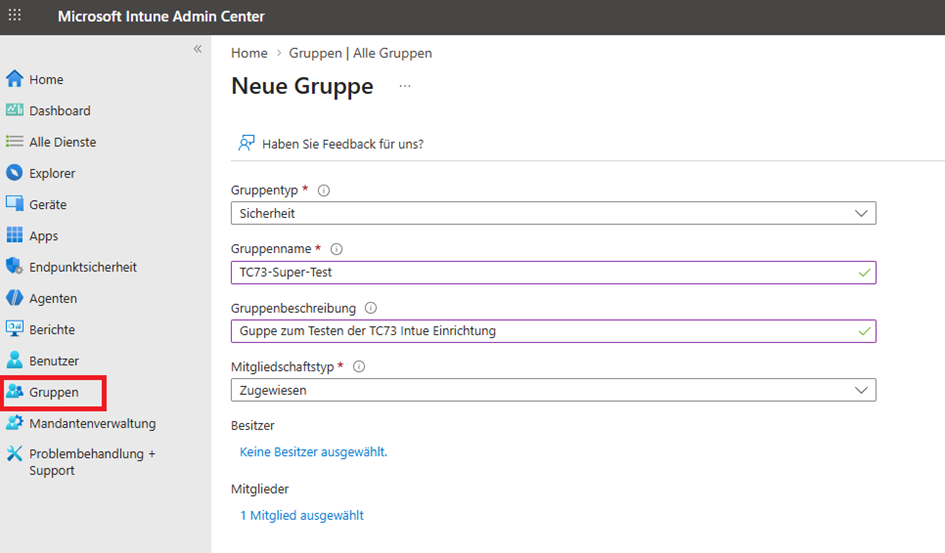
Assign a device group:
Create a new device group in Intune (or use an existing one) and assign the device to it.
Then in Apps -> Android, assign the device group to the following apps:
- Zebra Enterprise Browser
- Zebra Enterprise Keyboard
- ProGlove Mobile Insight
Distribute Config.xml and menu.html via OEMConfig:
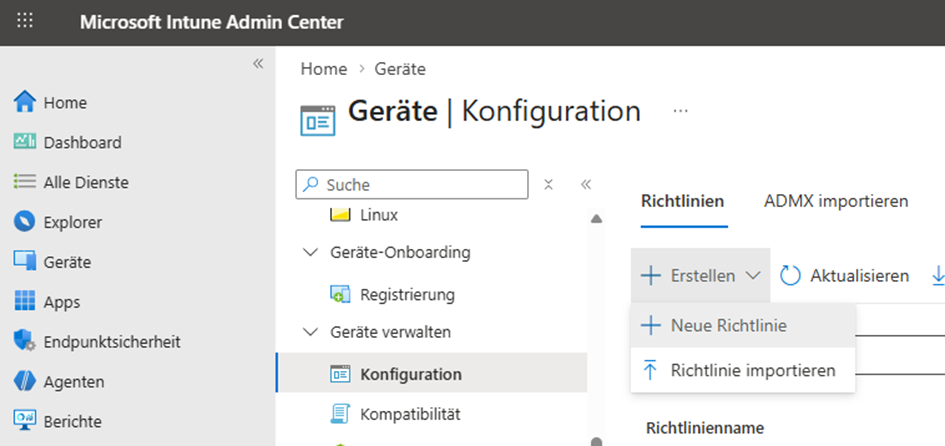
- Add a new policy under Devices / Configuration.
- Set Platform to Android Enterprise, Profile type to Templates, and under Template name select OEMConfig.
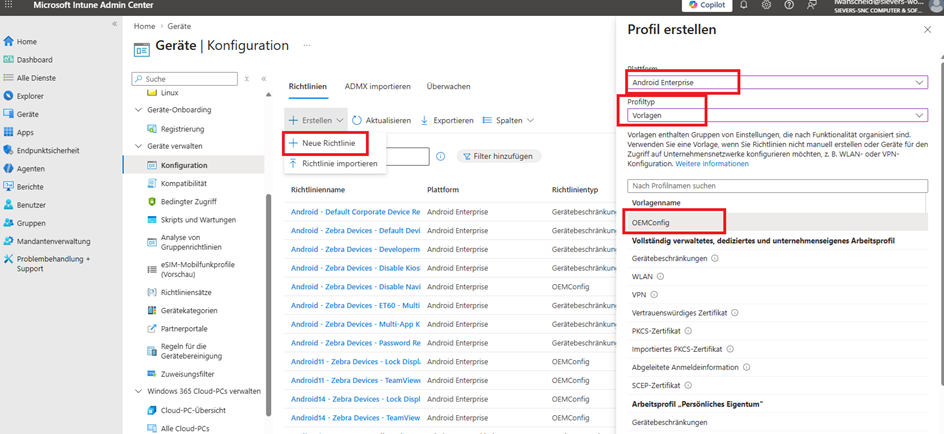
- Name the profile Android - Zebra Devices - EB Config Logistics, then select the OEMConfig app Zebra OEMConfig Powered by MX.

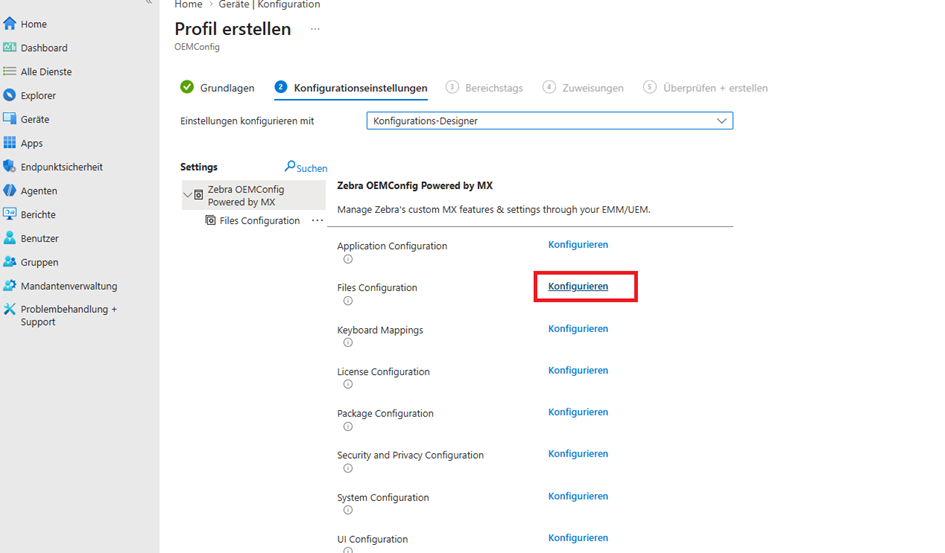
- In the configuration settings in the Configuration Designer, click Configure next to Files Configuration.
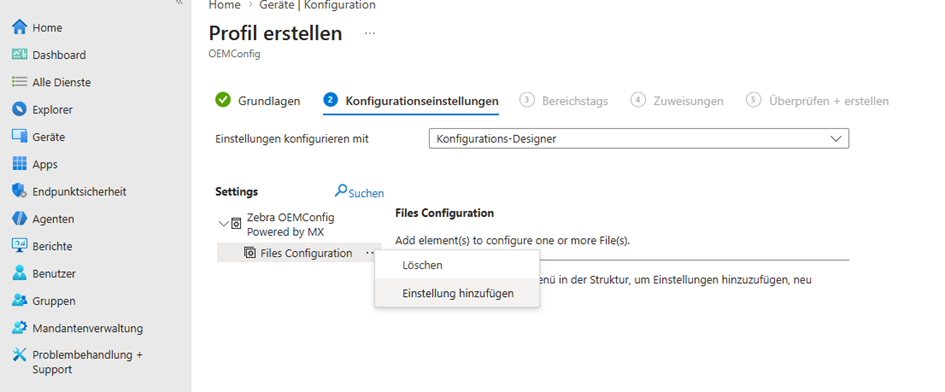
- Click Add a setting and select Download Option: On Server so that the file is always kept up to date.
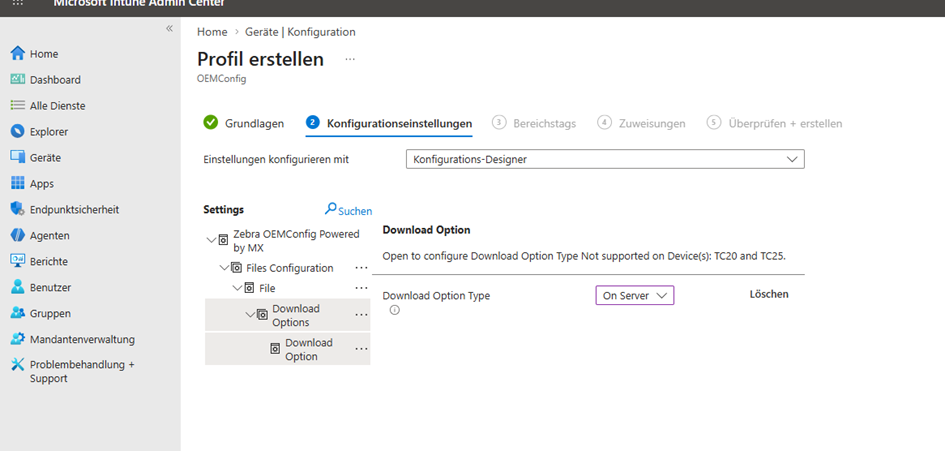
- Enter the following path for Device Path And Name:
/enterprise/device/enterprisebrowser/Config.xml. For Download Server URI, enter:https://sncproducts.blob.core.windows.net/datawedge/Config.xml?sp=r&st=2026-04-14T10:46:58Z&se=2036-04-14T19:01:58Z&spr=https&sv=2025-11-05&sr=b&sig=xjvG7FIAManV0hGTIXdNsqSs8FmE1vUpflvm9rj39AE%3D
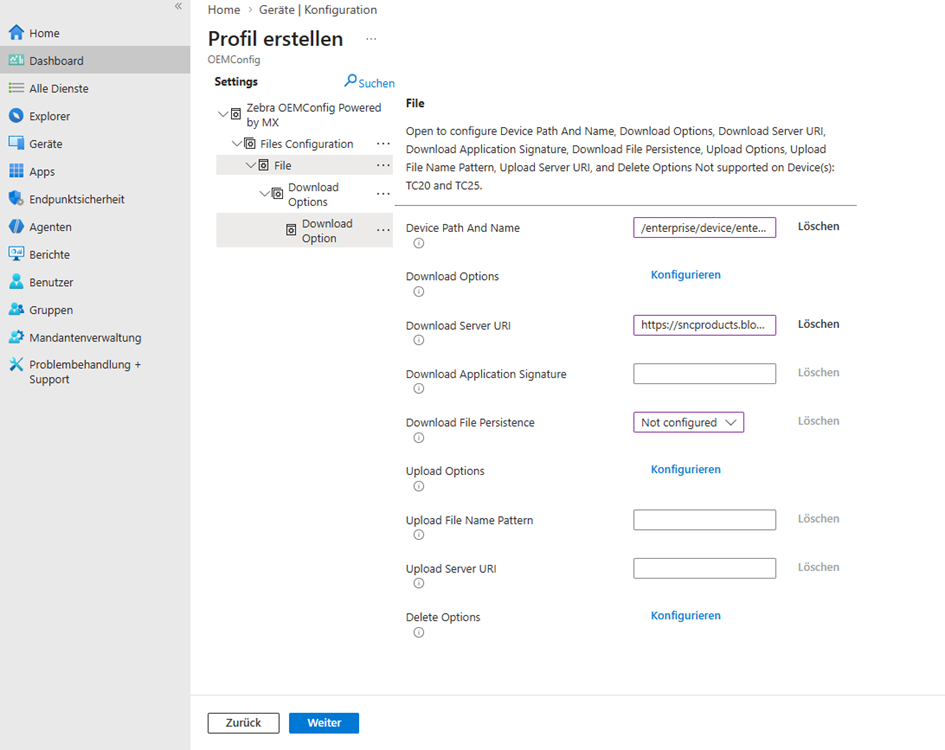
Repeat the process. Add another file entry with Device Path And Name
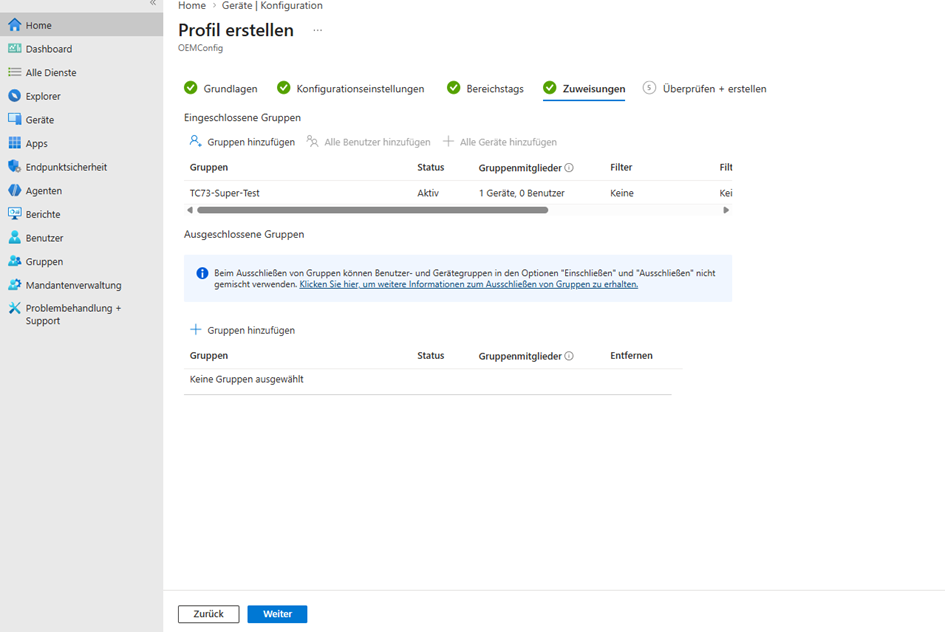
/enterprise/device/enterprisebrowser/menu.htmland Download Server URIhttps://sncproducts.blob.core.windows.net/datawedge/menu.html?sp=r&st=2026-04-15T07:38:13Z&se=2036-04-15T15:53:13Z&spr=https&sv=2025-11-05&sr=b&sig=0vxgbPeHejZknDKPFfyG3onc4S3VKZj2hCCeF5uaOSk%3D.Click Next and assign the device group to the OEMConfig configuration.
Hinweis
To add further devices, simply add them to the existing group or assign another group. Updates to Config.xml and menu.html are made via Azure Blob Storage, where the files can be edited.
Activate License via OEMConfig
Add three additional OEMConfig configurations for license activation:
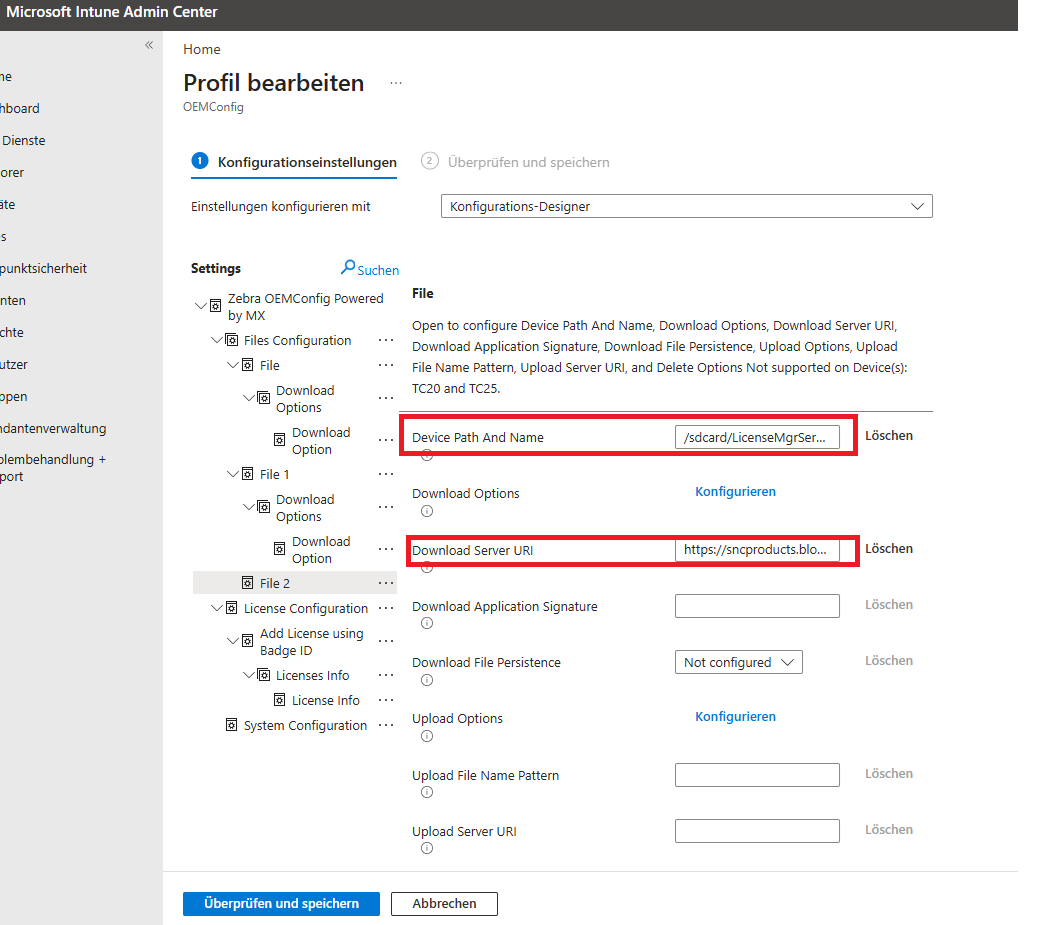
File Configuration – Downloads the Zebra License Manager app to the device:
- Device Path And Name:
/sdcard/LicenseMgrService_15.2.6.apk - Download Server URI:
https://sncproducts.blob.core.windows.net/datawedge/LicenseMgrService_15.2.6.apk
- Device Path And Name:
System Configuration – Installs the APK via a Pass-Through command:
<wap-provisioningdoc>
  <characteristic version="14.0" type="AppMgr">
    <parm name="Action" value="Upgrade" />
    <parm name="APK" value="/sdcard/LicenseMgrService_15.2.6.apk" />
  </characteristic>
</wap-provisioningdoc>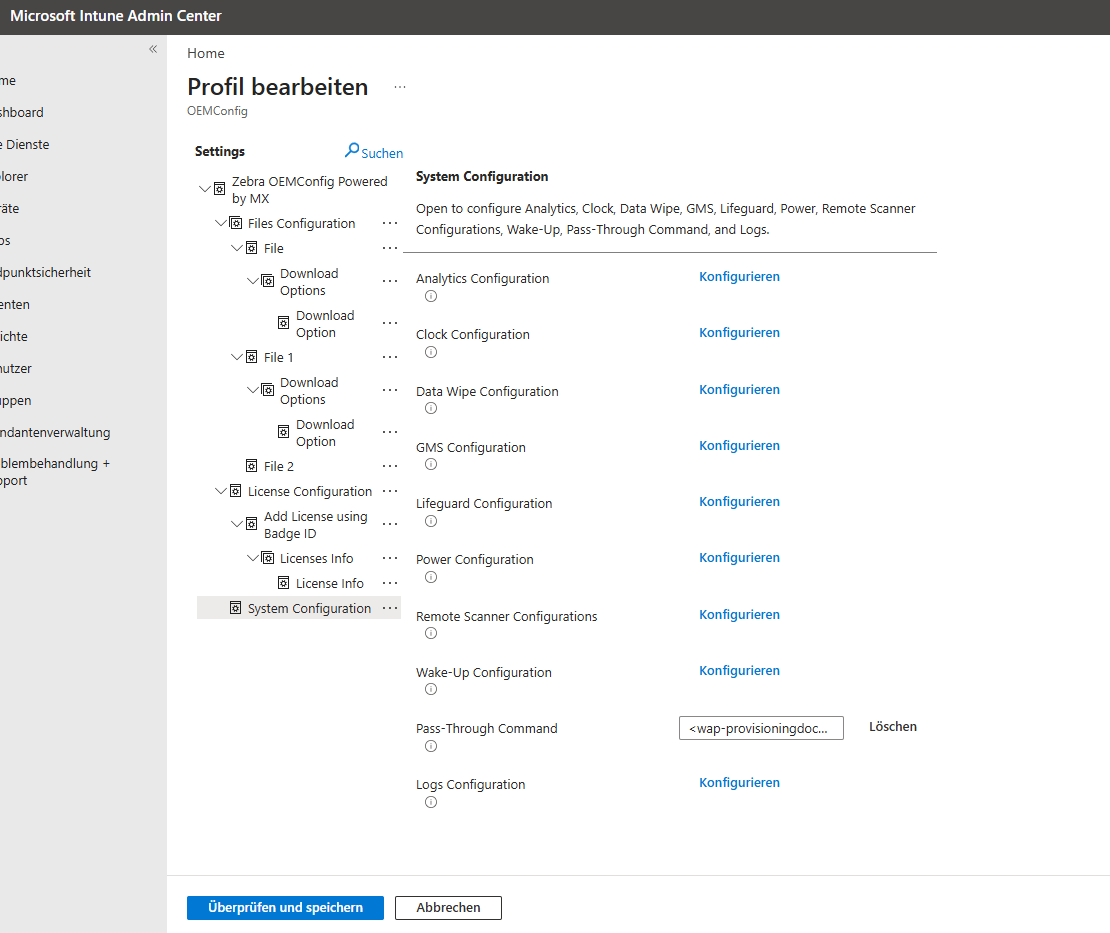
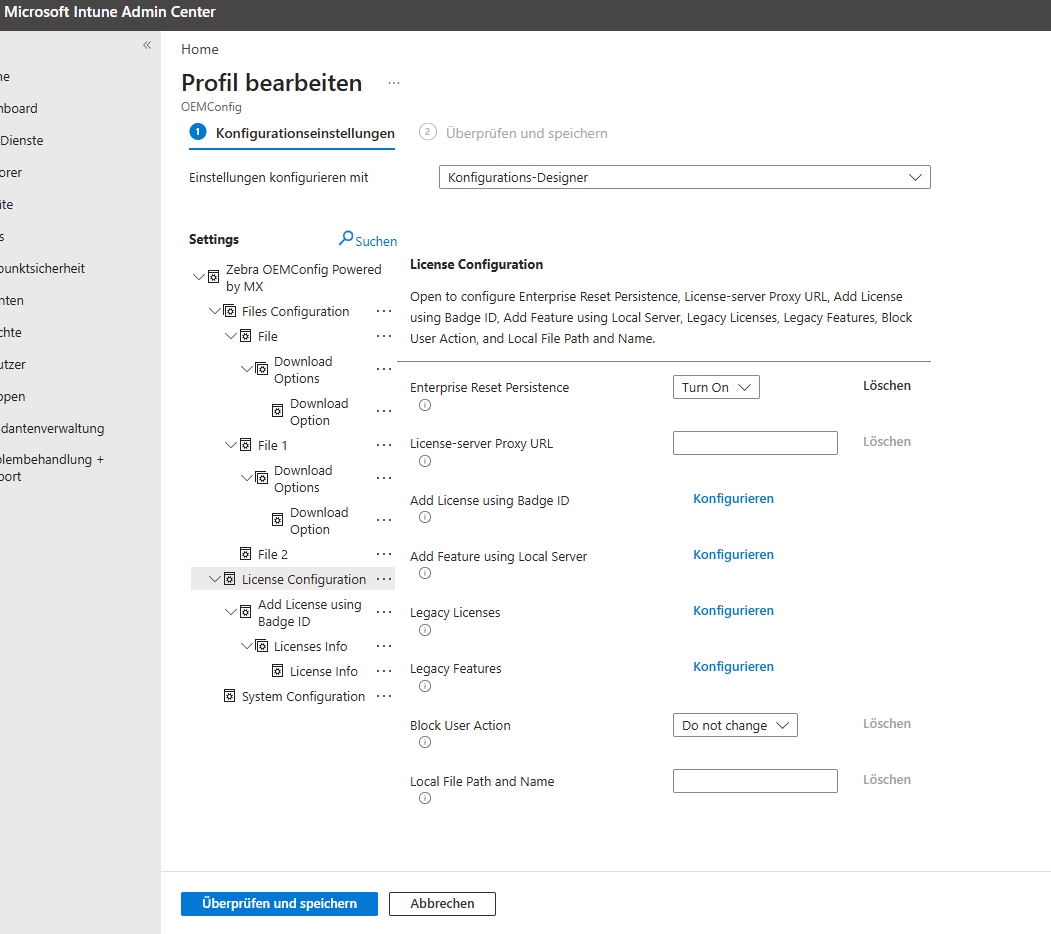
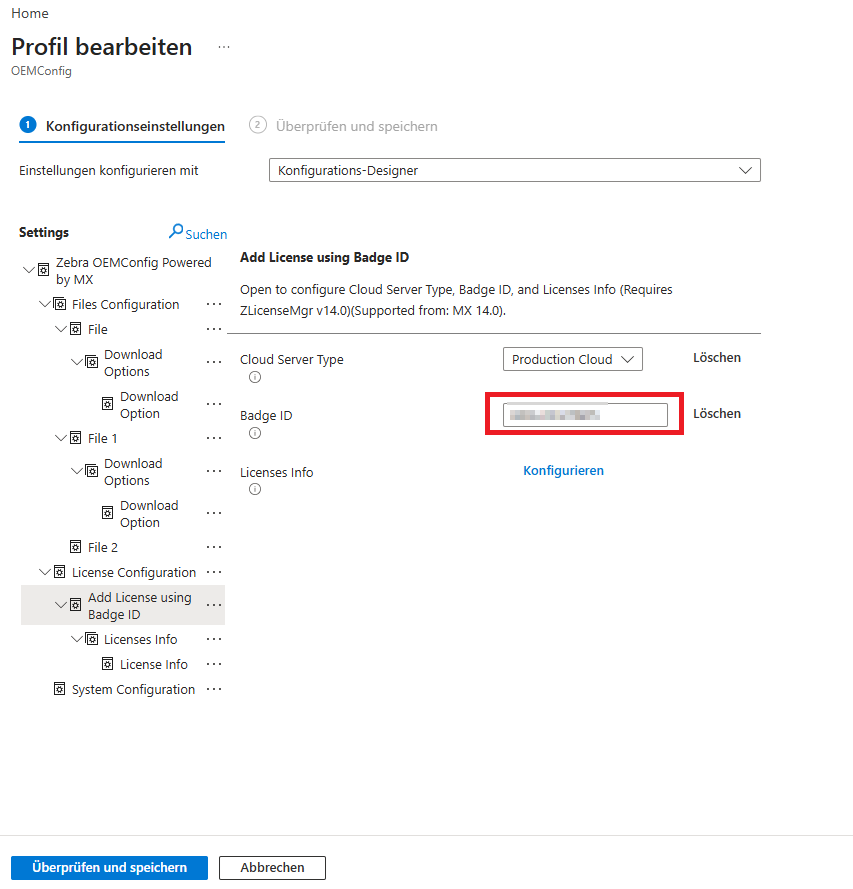
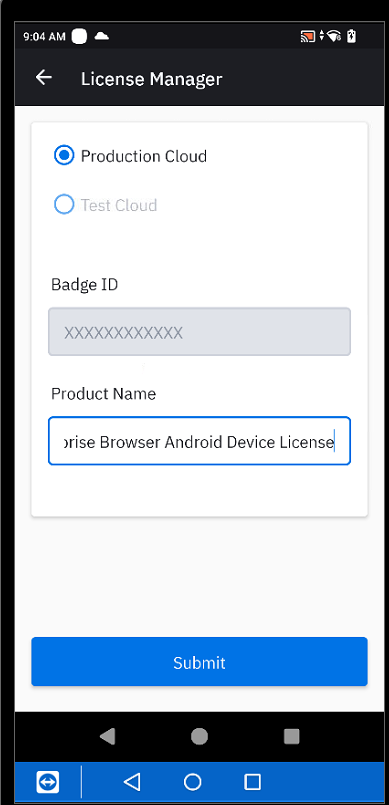
License Configuration – Add the license configuration, enter the Badge ID, and set the product name to "Enterprise Browser Android Device License" under Licenses Info.
Finally, select Review and Save, assign the device group, and save.
Hinweis
Updates to Config.xml and menu.html are made via Azure Blob Storage. Since the files are stored with the "On Server" option, devices automatically receive the latest version on the next connection.
For more information on OEMConfig setup, refer to the Zebra OEMConfig documentation.
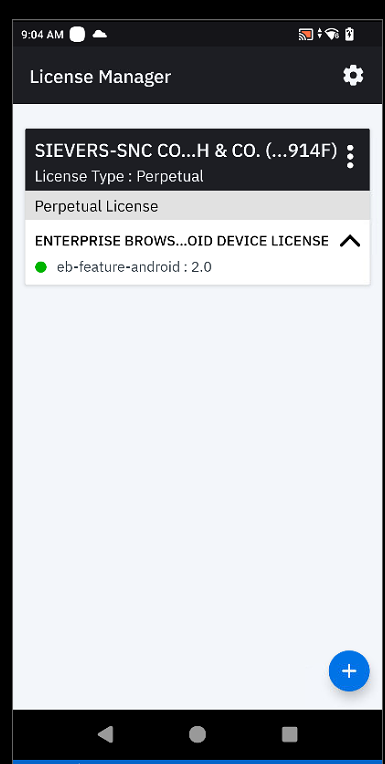
Activate License via Android App
It is also possible to activate the license for each scanner device manually and directly on the device.
- Scan the following barcode to download the required app:
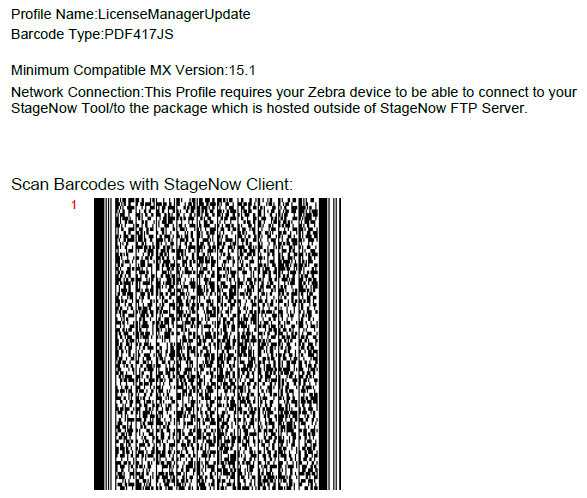
- Open the ZLicenseMgr app. Note: there is also a License Manager app installed on the scanners – that is the wrong one!
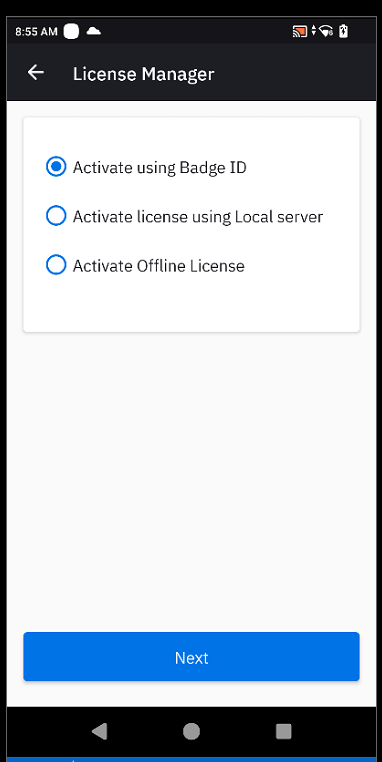
- Select Activate using Badge ID.
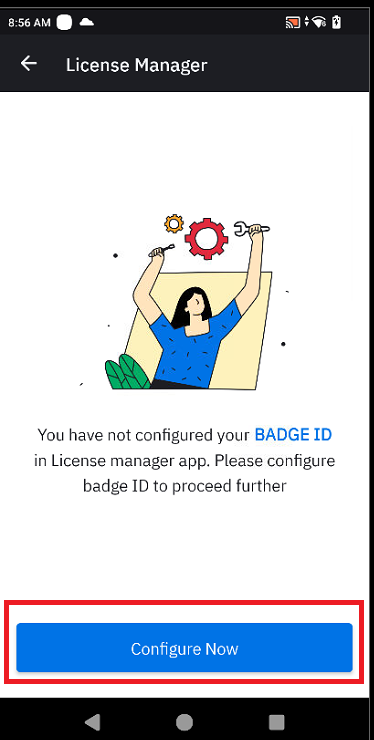
- You will receive a message that your Badge ID has not been configured yet. Click Configure Now, scan your Badge ID, and save it.
- Scan the product name:

- The license is now shown under the available licenses.