Setup and Usage
Once set up the solution automatically transfers the posting- and master data to the DATEV-Rechenzentrum when the SIEVERS DATEV exports are getting executed.
::: Attention Important Note About Access Authorization:
The SIEVERS DATEV Buchungsdatenservice automatically verifies that your DATEV client has the required authorization for the Buchungsdatenservice. This verification is performed with every authentication and before every data transfer.
If your client does not have a valid authorization for the Buchungsdatenservice, an error message will be displayed and data transfer will not be possible. In this case, please contact your DATEV service provider to activate the service. :::
Before you can start with the setup in Business Central, the DATEV client must be registered for the Buchungsdatenservice in MyDATEV. For this purpose, DATEV provides instructions in video and text form on the page Set up Buchungsdatenservice.
Hinweis
In BC 14 CU 1, the OAuthLanding.htm file on the server must be replaced with a newer version, e.g. from BC 14 CU 53, as only OAuth 1 but not OAuth 2 is supported in CU 1. Your Business Central partner can advise you on this.
The setup takes place on the page SIEVERS DATEV Posting Data Service in business central.
Setup Wizard
For initial setup, the SIEVERS DATEV Buchungsdatenservice Setup Wizard is available. It guides you step by step through the required configuration.
::: Attention A prerequisite for using the setup wizard is an existing SIEVERS DATEV setup. If no DATEV setup exists, an information message appears asking whether the DATEV App's setup wizard should be opened. :::
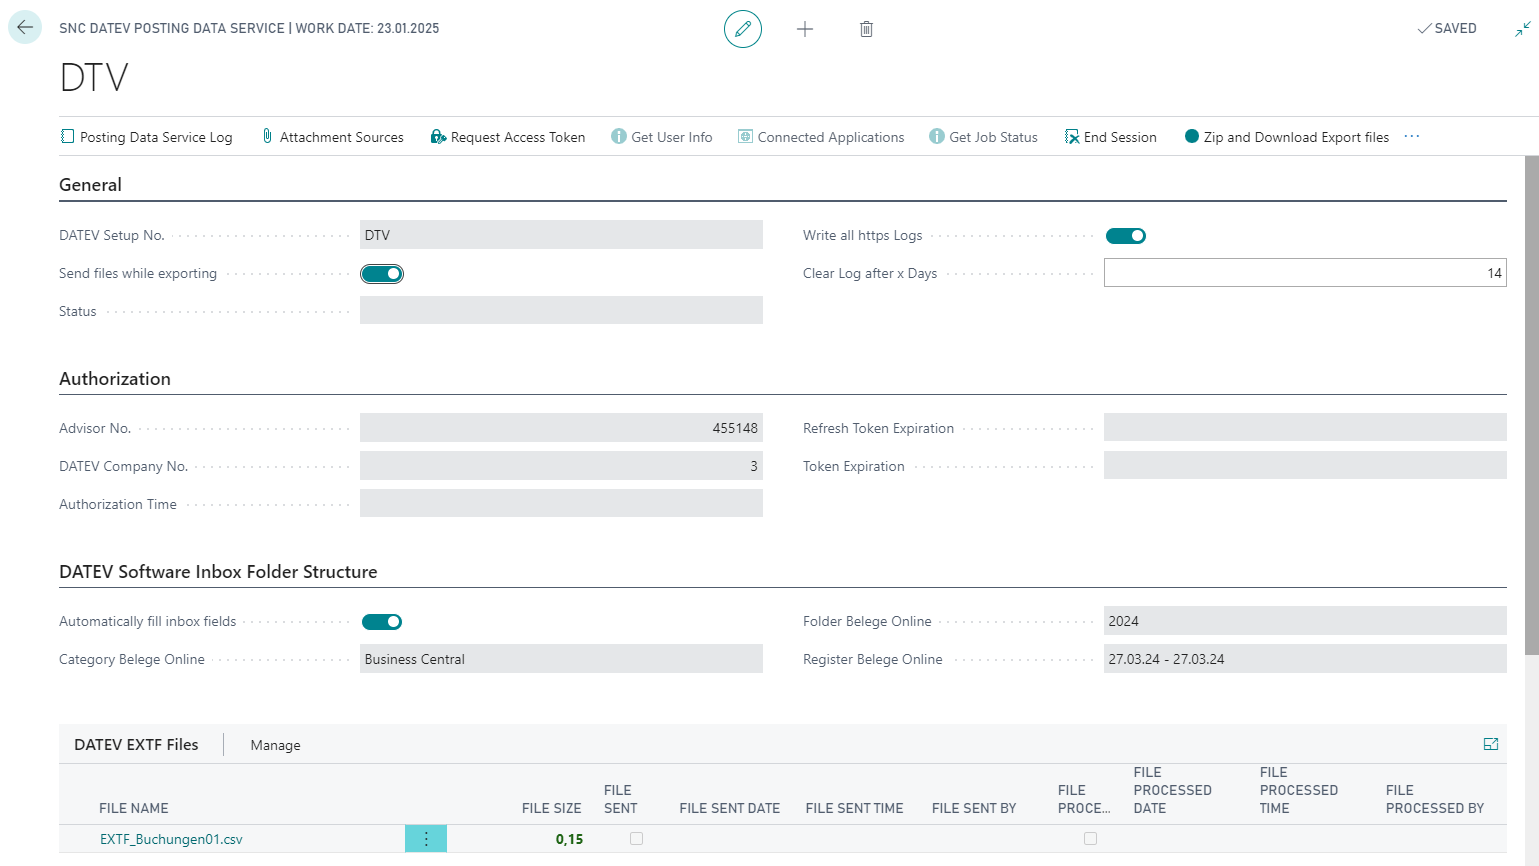
General
- DATEV Setup No. Specifies the DATEV Setup No.
- Status: The current status.
- Send files while exporting: With this option you activate the data transfer during the SIEVERS DATEV export. If the option is enabled, the other fields of the setup will be read-only.
- Clear Log after x Days: Specifies after how many days the log data will be deleted. Zero days: The log will never be deleted automatically. Otherwise a minimum of 14 days is expected by DATEV eG. You can find further information about the log in the section Service Log.
Hinweis
If the DATEV Setup is renamed, the associated Posting Data Service setup and the attachment sources setup are automatically renamed as well. If a DATEV Setup is copied, the Posting Data Service setup and the attachment sources setup are also included in the new setup.
Hinweis
If you want to send the exported files yourself, you can also download them locally to your computer via Zip and Download Export files in the menu bar.
Authorization
- Advisor No.: Enter the numeric code of your DATEV service provider here.
- DATEV Client ID: Shows the identifier for the DATEV data set composed of the advisor number and the DATEV company number.
- Use Long-Lived Refresh Token: Enable this option before requesting an access token so that DATEV issues a long-lived refresh token for this DATEV setup. A valid long-lived refresh token is required for automatic DATEV export.
- Refresh Token Expiration: Specifies the expiration date of the refresh token.
- DATEV Company No.: You have received a company number from your DATEV service provider. Enter it here.
- Token Expiration: Specifies the expiration date of the token.
- Authorization time: Specifies the authorization time.
- Authorized User Name: Shows the full name of the person who authorized the DATEV connection after a successful sign-in.
What happens during authentication?
The Buchungsdatenservice must not access DATEV without your approval. For this reason, an authorized user signs in once using DATEV SmartLogin. DATEV then issues two time-limited credentials:
- The access token is the short-term credential for communication with DATEV. The application uses it to transfer posting and document data. For security reasons, it regularly expires.
- The refresh token is a longer-lived credential. It is not used to transfer data. It is only used to request a new access token when needed, so signing in again is normally not required.
The authorization always applies to one specific DATEV data set. This data set is identified by the advisor number and DATEV company number, which are combined in the DATEV Client ID. A token for one data set therefore cannot be used for another DATEV setup.
Authentication process
Hinweis
Changed (August 2026): The connection is bound to the displayed DATEV Client ID. The status Connected is only set after DATEV has confirmed that the associated data set can access the Buchungsdatenservice.
In order for the SIEVERS DATEV Buchungsdatenservice to be able to communicate with DATEV, a few authentication steps must be carried out.
- Activate the SIEVERS DATEV Buchungsdatenservice with DATEV advisor and company number at DATEV. Once this step has been taken, you or your tax advisor will receive login data (Smart Login), which is necessary for authentication.
- Then select Request Access Token in the menu of the SIEVERS DATEV Buchungsdatenservice setup.
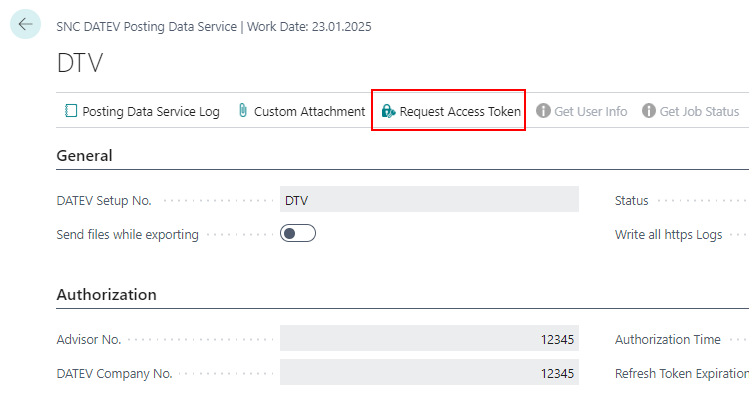
In the window that opens, click the Open DATEV sign-in button to open the DATEV sign-in page in a separate window.
Hinweis
Pop-ups for Business Central must be allowed in the browser for the sign-in window to open. If the window is blocked or closed before the sign-in is completed, the Buchungsdatenservice displays a corresponding error message and offers a button to restart the sign-in process.
When it comes to selecting the login procedure, now choose DATEV SmartLogin.
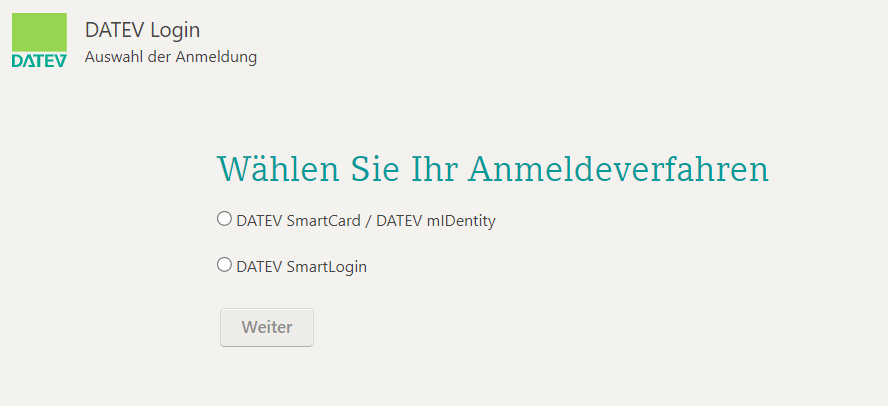
- Now log in using the SmartLogin app.
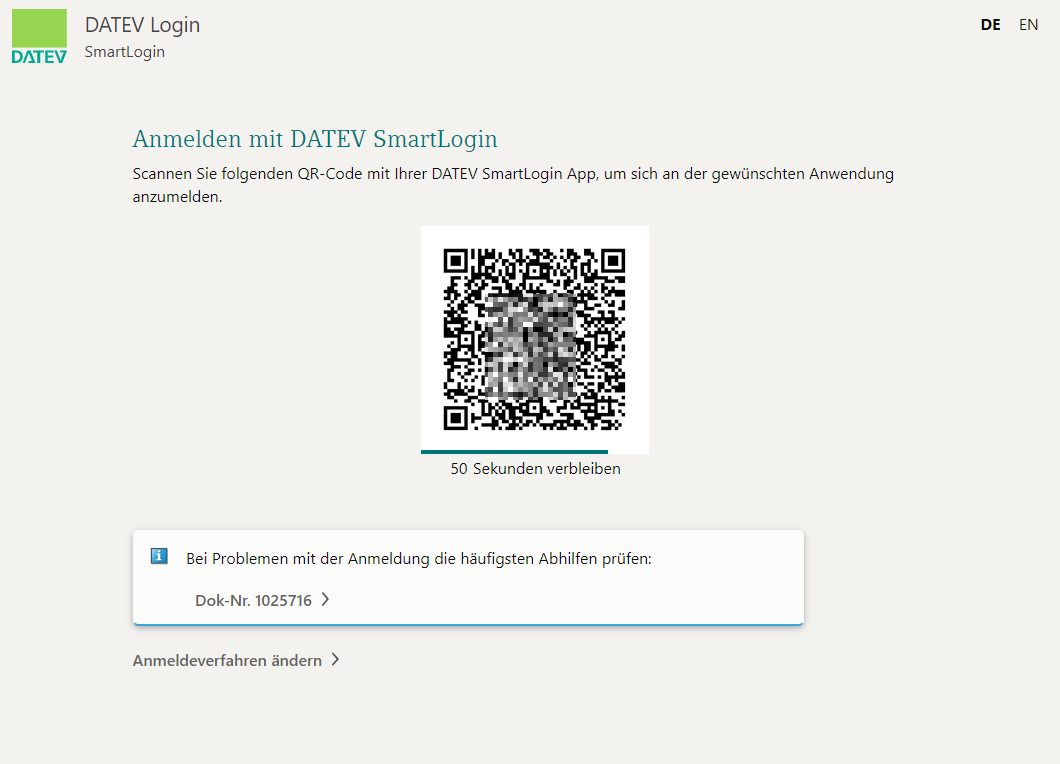
- A message then appears stating that the access token has been updated.
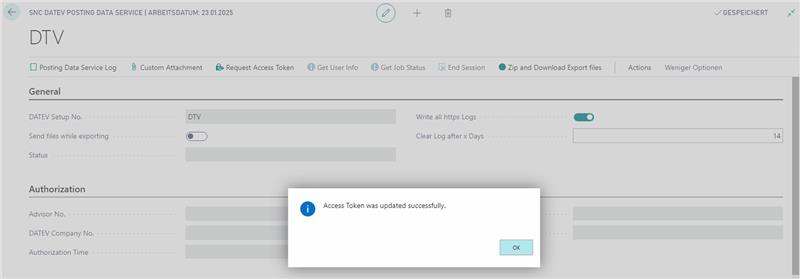
- After receiving the access token, the system automatically verifies that the specified data set (advisor and client number) has the required authorization for the Buchungsdatenservice. This verification ensures that only authorized clients can transfer data.
- If the authentication and authorization verification were successful, the status in the General area shows Connected.
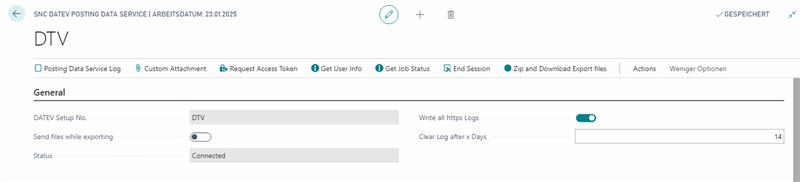
Before every data transfer, and whenever the token expiration is checked, the system additionally verifies that the access token is actually still present. If it is not, a new access token is requested automatically using the refresh token, without requiring you to sign in again. Only if this renewal also fails is the connection reset, and signing in again becomes necessary.
Manage Connection
Credentials are managed separately for each DATEV Setup No. Therefore, multiple DATEV setups each use their own connection. Token values themselves are neither displayed nor written to the service log.
After a successfully completed transfer run, DATEV revokes the current access token. This is an additional security measure: a short-term credential needed for the transfer does not remain valid longer than necessary. The refresh token remains available for the configured connection so that a new access token is automatically requested when needed for a later export. Renewal is coordinated for each DATEV setup, including when transfers are started at the same time.
The sequence is therefore: the application requests an access token from DATEV, transfers the data, revokes the used access token, and keeps the refresh token for the next transfer. You only need to sign in with DATEV again when the refresh token has also expired, been revoked, or can no longer be used.
To change the refresh-token mode or completely remove a connection, choose End Session. This revokes the access token and refresh token at DATEV and removes the local connection data. A new authentication is then required. Use Connected Applications to open DATEV's overview of authorized applications.
Documents
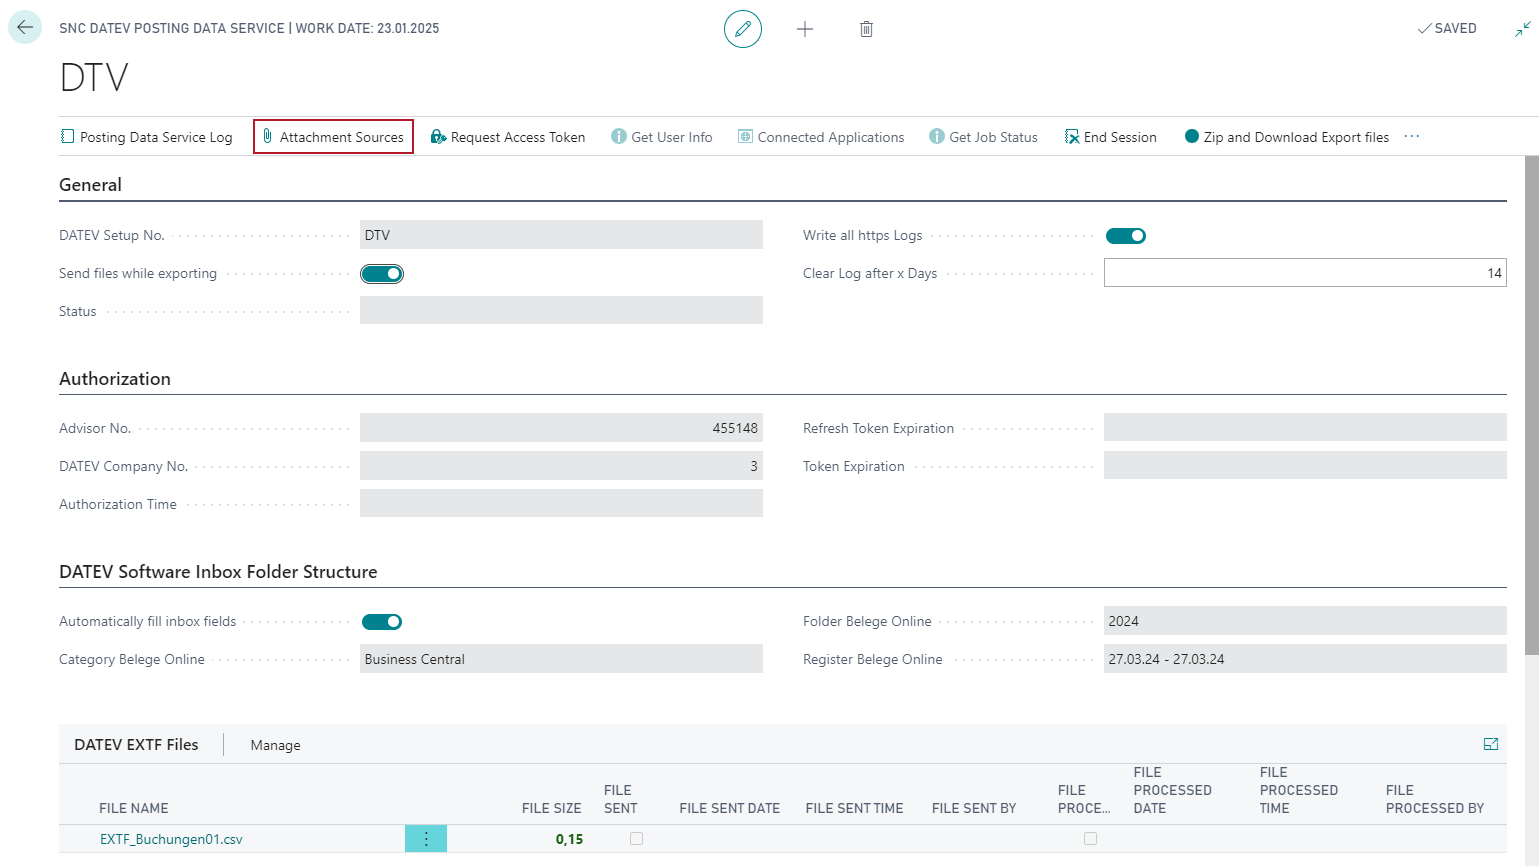
The sources for the attachments can be specified using the Attachment Sources button.
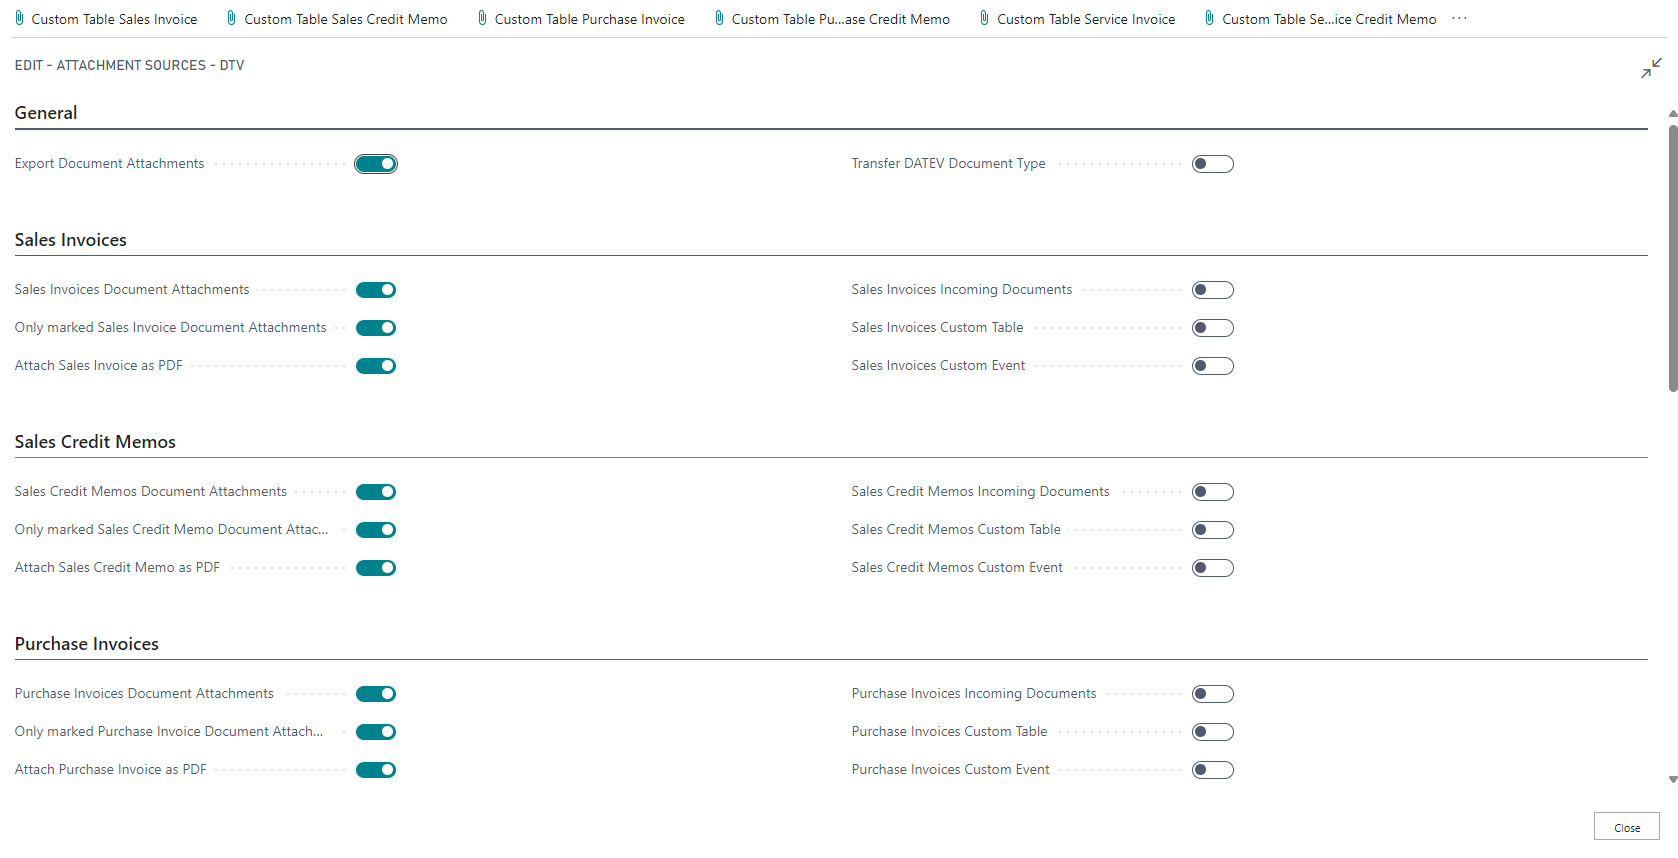
- Export Document Attachments: If this option is enabled, any file attachments such as PDF files will also be exported.
Hinweis
Unallowed signs in the names of the document attachments will be replaced by underscore by DATEV. DATEV allows these signs in the names of the document attachments: Space &()+-._ 0-9A-Za-zÀÁÂÃÄÅÆÇÈÉÊËÌÍÎÏÐÑÒÓÔÕÖØÙÚÛÜÝÞßàáâãäåæçèéêëìíîïðñòóôõöøùúûüýþÿ
The following document types are supported:
- posted sales invoices
- posted sales credit memos
- posted purchase invoices
- posted purchase credit memos
- posted service invoices
- posted service credit memos
- invoices from general journals
- credit memos from general journals
- invoices from purchase journals
- credit memos from purchase journal
Document attachments may not exceed 20 MB. Depending on the file size, the number in the File Size field in the Exported Attachments and Attached Documents tables is coloured:
- Up to 0.5 MB = green
- 0.5 - 20 = yellow
- More than 20 MB = red
If a file is larger than 20 MB, it is not exported and a log entry is created.
Provided that Export document attachments is activated, it is selectable what exactly the source of this attachment should be. Here you have the following options:
Document Attachment
Incoming Documents
Custom Table: For this purpose, the Custom attachment page must be filled out beforehand. See Custom attachment
Custom Event: With this option there is the possibility to fill the table DATEV Exported Attachments by yourself. You can find the corresponding sample code in section Custom Event
Transfer DATEV Document Type: If this option is activated, the DATEV document type “Rechnungsausgang” or “Rechnungseingang” for a posted purchase invoice will also be transferred when the PDF files are transferred. A check is made for the document types set up in the DATEV software. The transfer of the DATEV document type is neither prohibited nor recommended by DATEV.
Only marked Document Attachments: With this indicator you determine for the supported document types whether only documents marked with Use for DATEV export are to be part of the export. You can set this marker called Use for DATEV export directly in the document in the attachments - see Service documents. This indicator is automatically set in the attachment after posting from BC 17 onwards.
Posting
- Use these option buttons (e.g. Attach Sales Invoice as PDF) to determine which reports should be automatically exported as PDF file attachments to documents.
In general, all switches can be set for a document. As soon as an attachment is found in the form of a PDF file, it will be used for export. As described above, the order of checking the BC tables is first the document attachments, then the incoming documents, then the custom table and then the custom event.
- Automatically fill inbox fields: The next three fields mentioned must be filled either manually or automatically.
- When filling automatically, the field
- Folder Belege Online is entered with Business Central.
- Category Belege Online is entered with the year of the DATEV export carried out.
- e.g. 2024
- Register Belege Online is entered with the period of the export.
- e.g. 01.01.24 - 31.12.24
- When filling automatically, the field
- Folder Belege Online: The first level of document storage of Belege Online.
- Category Belege Online: The second level of document storage of Belege Online.
- Register Belege Online: The third level of document storage of Belege Online.
Hinweis
Please note that when transferring documents into a target folder structure defined here, the associated documents will be set to "Posted".
Achtung
Before exporting and sending the data via the Buchungsdatenservice, it is checked whether the three fields were actually filled in manually. Otherwise the export cannot be carried out.
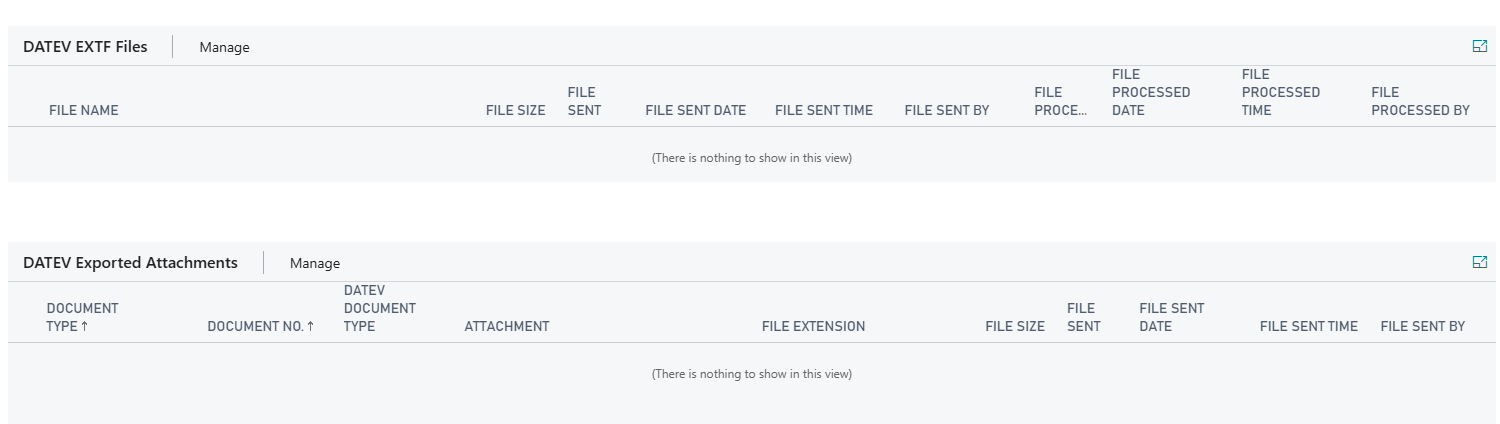
In the lower area of the documents you can find the sent DATEV EXTF files and the exported attachments - for example PDF files of the invoices. On the right side of the table you can see if the respective file has already been sent and processed.
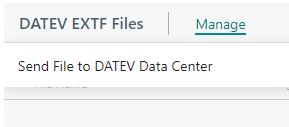
Via Send File to DATEV Data Center you are able to resend files to the Data Center again.
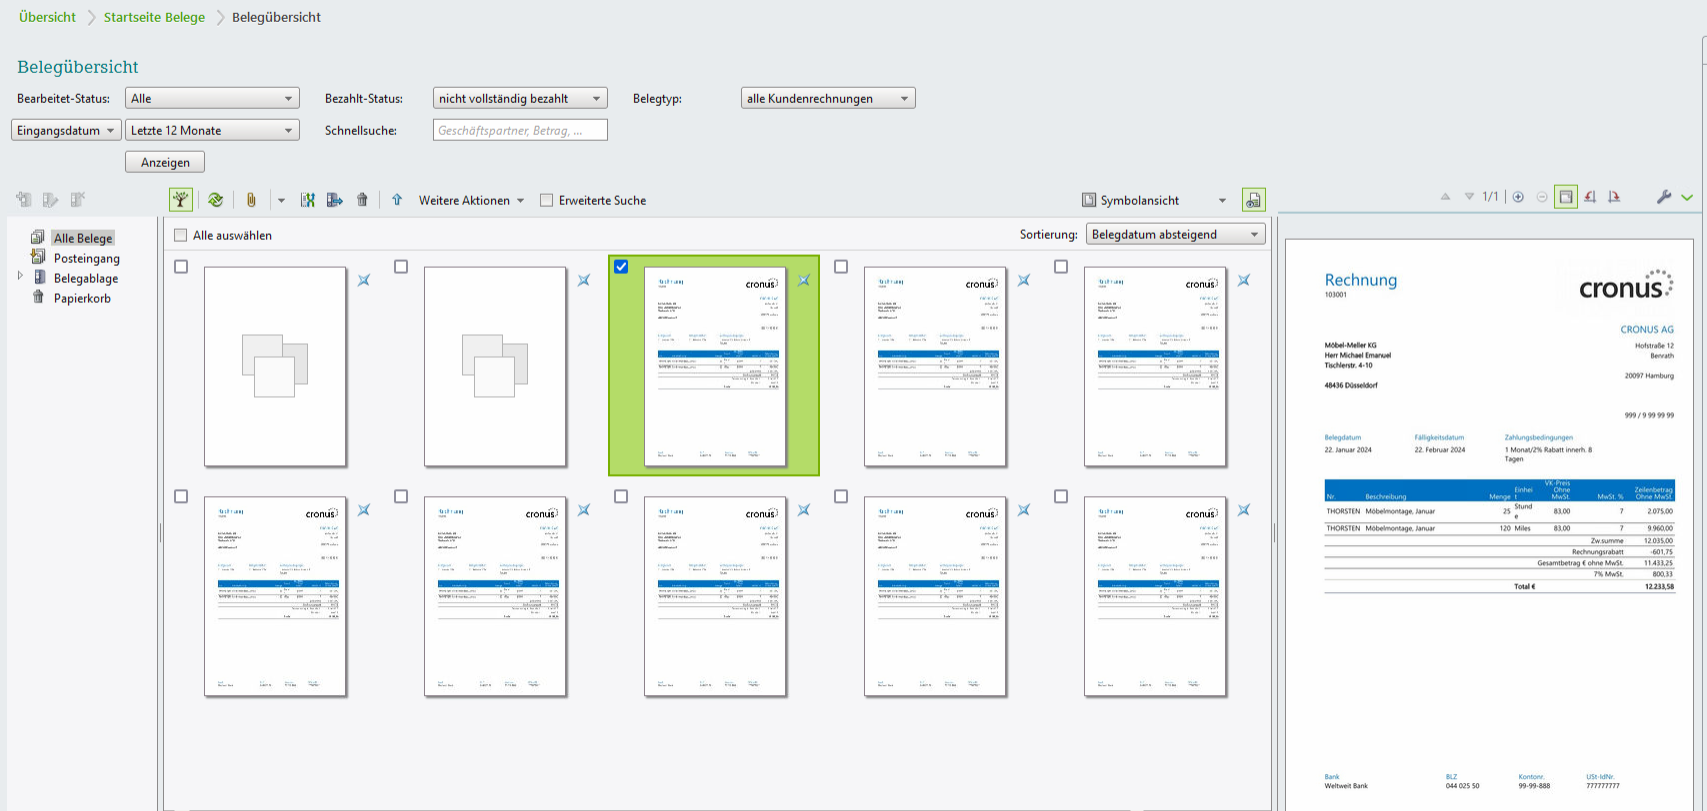
The mentioned PDF files can be seen in the document overview of Unternehmen Online after the export.
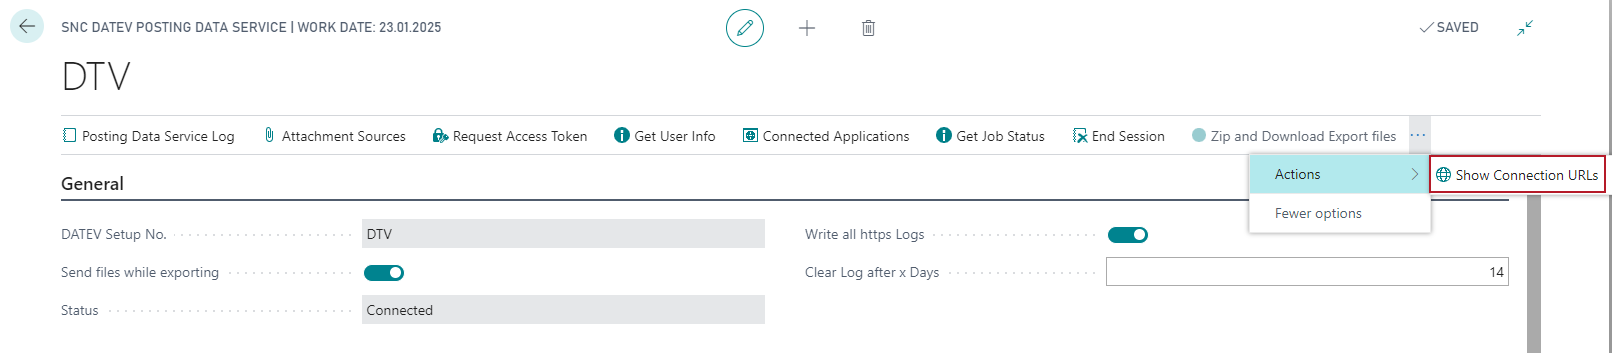
Connection URLs
In the DATEV Buchungsdatenservice setup, you can also view all connection URLs and customize the State redirect URL as you wish. However, you must first make this section visible. To do this, select the Display connection URLs action in the menu.
The new section then appears:
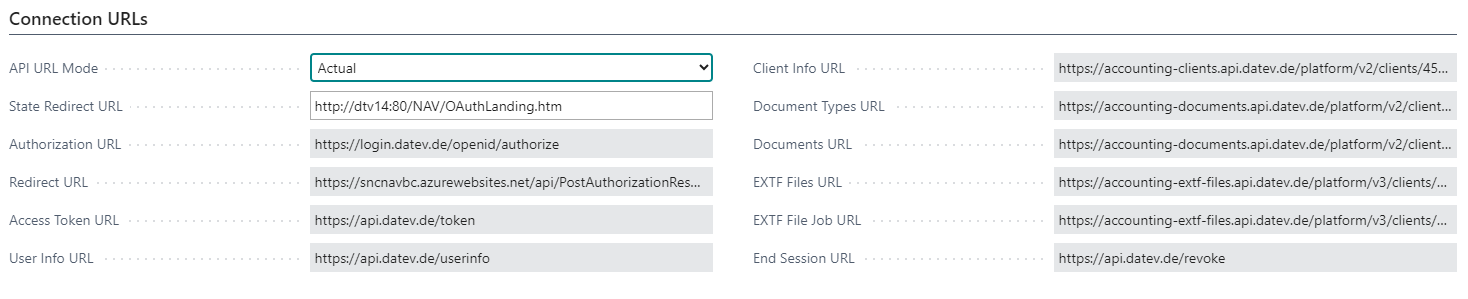
These fields are primarily used to provide information in the event of connection problems. The State redirect URL can be changed for special systems.
Service Log
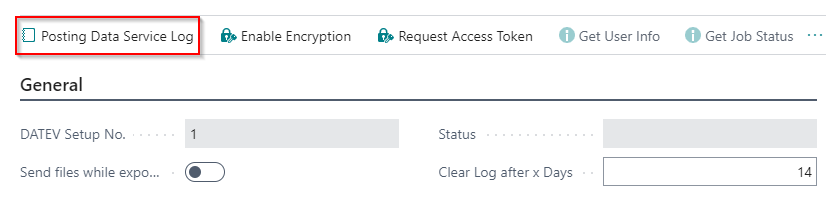
Via the DATEV Posting Data Service Log you are able to view a lot of information about the communication the the DATEV Rechenzentrum. In addition, any error messages are displayed in this log. In the menu area of the log you can also view further information about transferred data.
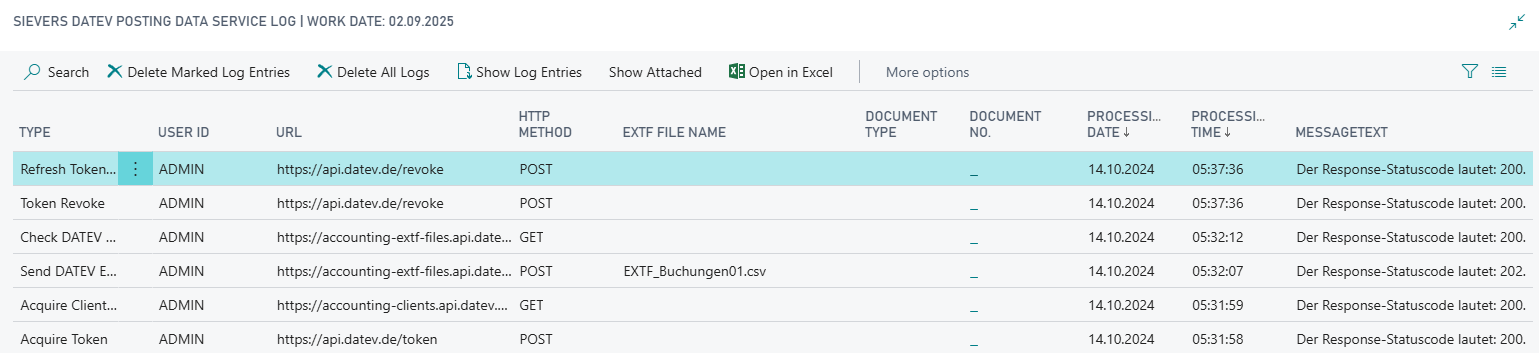
If data from the Buchungsdatenservice is missing during the export, it will be noted in the SIEVERS DATEV log. This also applies to custom events and custom tables.